The tools and plugins recommend in the site are the ones we use, have tried or tested ourselves and recommend to our readers. Marketing With WP is supported by readers like yourself. If you take an action (such as a purchase) we might earn an affiliate revenue at no extra cost to you.
How to add Google Analytics 4 (GA4) to WordPress using Google Site kit plugin

One of the easiest way to understand your visitors behavior and their actions on your website is with the help of Google Analytics. Find out how to get started with our step-by-step guide to add Google Analytics to your WordPress website for beginners.
Starting off, there are a few ways to access your website’s Google Analytics data. In this post, we’re going to show you the easiest way to do it and also access the data in your admin dashboard using Google Site Kit.
Bringing in traffic is the most crucial goal of your business website. Even more important is finding out how they’re coming and interacting on your site. For that, Google Analytics is the right tool for your use. To get it working, you’ll just have to connect your Google Analytics account with Google Site Kit plugin on your WordPress website.
Normally, adding Google Analytics to your WordPress website is possible either by –
- Modifying theme file to insert the tracking code on your site’s source code or
- Installing Google Site Kit plugin
Going the plugin route makes things very easy – just install a plugin and click a few buttons to configure. Moreover, the plugin makes it better by letting you see an excerpt of your traffic stats and insights directly on your WordPress dashboard.
So here, we’re going to see how you canadd Google Analytics on WordPress with a plugin.
But first, let’s understand the importance of Google Analytics for your business.
Why use Google Analytics?
Google Analytics is a fantastic tool useful for every type of business and website owner. It lets you see all about your visitors’ persona and activities. As a result, you can create more working strategies and measure the success of your business.
Having that said, let’s see the reasons you should have Google Analytics for your website.
1. Get visitor insights
With Google Analytics, you’ll find general data of users like location, gender, age, etc. Similarly, you can also find out what devices and browsers they’re using to access your site. This helps you identify if you’re engaging your target audience.
2. Analyze the visitors’ behavior
Google Analytics tracks how users are using your website. It shows how long they stay, where they click, how many bounces, what they download, etc. You can use that information you can find out whether your marketing strategy has worked.
3. Identify traffic sources
You can find out what channels are bringing traffic to your site. Are they visiting your site through search engines, social media networks, or through a link they find on other websites, or with direct URLs? This information will help you optimize your most preferred traffic channel.
4. Provide insights on content types
Google Analytics shows which web page or post has to bring in the most visitors. This will guide you to focus on creating specific types of content for gaining more visitors.
5. Provide Better user experience
The collected data with Analytics gives you an understanding of things you need to improve. With that, you can offer a better experience to your visitors.
Now, let’s see how you canadd Google Analytics to your WordPress site and get it working.
How toadd Google Analytics to your WordPress Site
Google Analytics has recently announced version 4 i.e. Google Analytics 4. It’s improved with new capabilities and has a little different approach. So, make sure you follow the exact steps we show here.
Connecting Google Analytics to your WordPress site is just a few steps away. Here’s how it’s done.
Step 1: Signup with Google Analytics
To connect Google Analytics with your website, the first thing you need to have is a Google Analytics account. Creating one is easy – you need to have is a Google Account (which everybody has).
So, go to Google Analytics, and sign in with your Google account.

After successful signup, you’ll reach a page just like the one below.

Click on the Start Measuring button to continue.
Step 2: Setup your Google Analytics Account
The next step is to set up your account. On the next page, it will ask you to enter your account name.

On clicking on Next, it’ll ask you to enter more details i.e. property name, location, time zone, and currency. Enter your details accordingly. You can also change these settings later.
After done, click on Next.

Then, fill in your business info like industry category and business size. Below that, tick the boxes according to your preferences for the Google Analytics features you want to use.

Finally, click on Create at the end of the page.

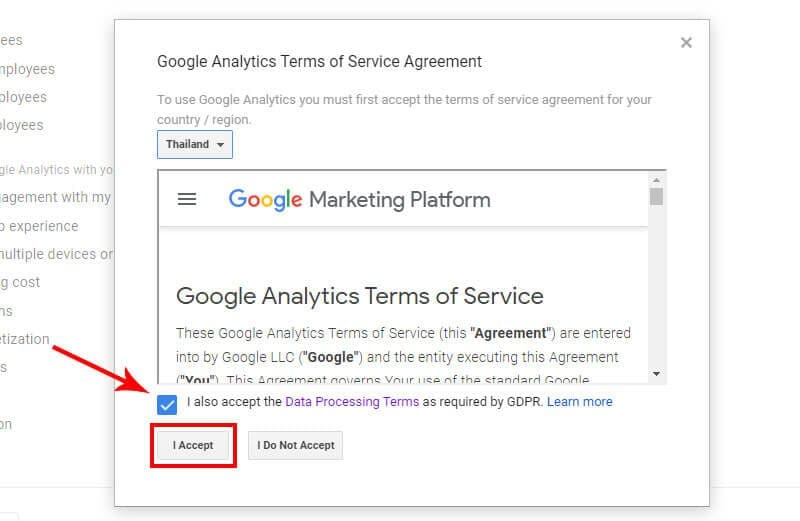
After that, a dialog box will pop up to accept the terms and conditions. Just select your country and accept it to move to the next step.
It’ll take a few seconds to get it ready.
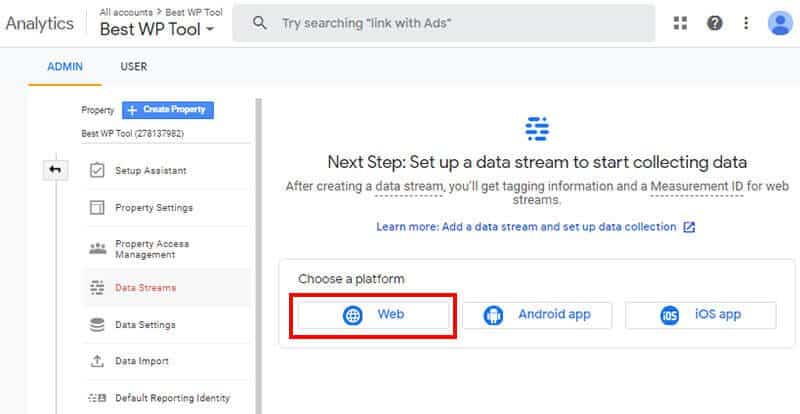
Step 3: Setup your data stream
As soon as your account is created, it asks you to choose a stream type. You can choose from the options – Web, iOS, and Android. From there, select the Web option as you’re using it for your website.
Now, another screen pops up to enter your website URL and name your stream. Make sure you pick the right URL prefix too – ‘http://’ or ‘https://’. After that, click on the Create stream button.

After doing so, you’ll get your stream details like measurement ID, global site tag, etc. on your next page.
Leave it be and move on to the next step.
Step 4: Install Google Site Kit Plugin on WordPress
Next, you need to install a plugin to connect with your Google Analytics account. Actually, there are a lot of good options like Site Kit by Google, MonsterInsights, Analytify, etc.
Here, we’re doing it with Site Kit by Google for showing you.
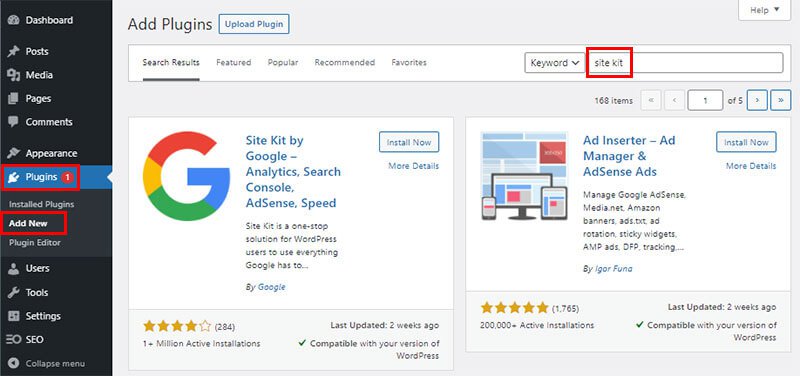
So, log in to your WordPress site dashboard and install the plugin. For that, go to
Plugins > Add New
From there, search ‘Site Kit by Google’. Wait till the plugin appears and click on the Install button next to it.
After done, click on Activate right away.
If you want more details, you can read our article on how to add a plugin to your WordPress site.
Step 5: Setup Site Kit
After activation, you’ll be directed to your Installed Plugins sub-menu, where you’ll see a success message box.
Just below it, click on the Start Setup button and continue further.

On the next page, just click on Sign in with Google which will redirect you to a Google signup page. Just choose the Google Account that you had set up your Google Analytics on.

After that, it’ll ask you to allow permission to access your website console data, personal information, etc. Just allow it to access the data.

Then, it’ll take you through a number of steps to verify ownership and allow access to display data on your site.

Just do it accordingly. And at last, click on Go to Dashboard.

After that, you’ll see a dialog box with a success message of the Site Kit set up.
Step 6: Connect to Google Analytics
Now, the next step is to connect to Analytics. So, click on Connect Service below Analytics.

Then, click on the Configure Analytics button on the next page.

That’s all! Then, Google Analytics will be connected to your site.

After your site starts getting traffic, you’ll be able to see the stats as well. A benefit of using Site Kit, you can see the data on your WordPress dashboard too. Or else, you can also go to your Google Analytics to see the detailed data and analytics.
Conclusion
That’s all you’ll need to do toadd Google Analytics to your WordPress site.
We also recommend you to check out our complete guide to add and setup Google Analytics 4, and then connect Google Analytics to Search Console to synchronize and centralize all website data.
Finally if you are new to WordPress website, we recommend going through our complete guide on how to set up and configure WordPress website.


