The tools and plugins recommend in the site are the ones we use, have tried or tested ourselves and recommend to our readers. Marketing With WP is supported by readers like yourself. If you take an action (such as a purchase) we might earn an affiliate revenue at no extra cost to you.
Blocksy Theme In-Depth Tutorial – How to Customize Blocksy Free Theme?

Blocksy is a lightweight, fast, and modern WordPress theme offering lots of customizable features for creating nice-looking websites.
Despite being a relatively new theme, it has an exponential adoption rate backed by an innovative dev team. Most of it is because of the features it offers both in the free version and the premium version of the theme.
In addition, the features are broad to match the needs of any type of website. So, whether you want to create a blog, eCommerce website, business website, or any other kind of website, Blocksy theme works perfectly fine.
In this post, we are going to show you how to customize the Blocksy theme so that you can create a really nice-looking website and attract traffic. We will go through each and every option Blocksy offers in the WordPress customizer.
First, we will start with installing and activating the Blocksy theme.
Install Blocksy Free
To install Blocksy, first, you need to log in to your WordPress website. After that, go to Appearance > Themes from the dashboard menu.

On the next page, click on Add New Theme you see at the top or bottom of the page.

Next, search ‘Blocksy’ on the search bar and install the theme.

After installing, activate the theme right away.
It will redirect you to the themes page with the suggestion to install the Blocksy Companion plugin. It will get you access to custom extensions, demo templates, and more. Click and install the blocksy companion plugin

Import a Demo Website
Generally, you would start creating and customizing from scratch. But Blocksy offers a lot of premade website templates that you can import on your website. With that, you will have the basic website structure and all you need to do is edit it.
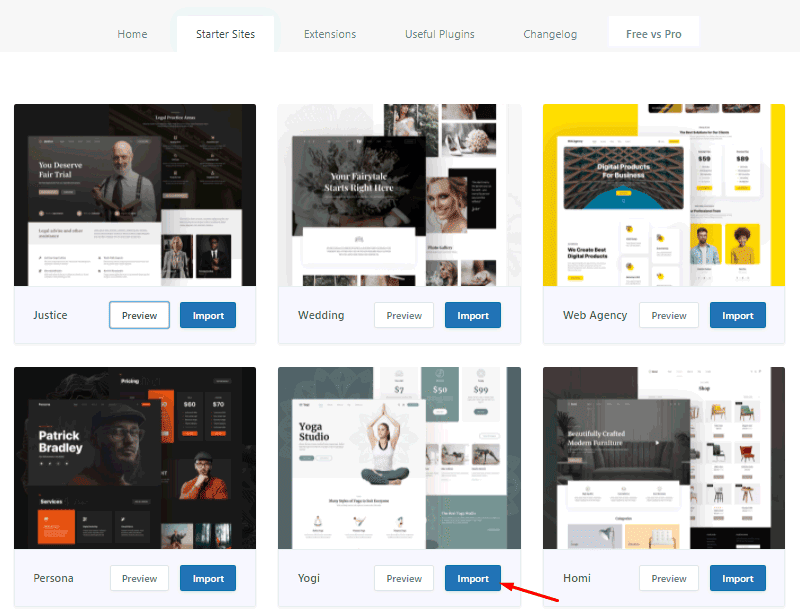
To import a demo website, go to Blocksy that’s newly added on the sidebar menu. On the next page, click on Starter Sites to see all the available templates.

You can preview the demo sites by clicking on the Preview button. After you find the one that you like, click on Import.
In the next step, it will ask you to install a child theme and recommended plugins that supplement the demo website. Click on the Next and Install buttons a few times. Then, it will start importing the pre-made templates. Please note that it may take some time to import the demo content.
Configure Blocksy from the WordPress Customizer
To start editing the theme, first, go to Appearance > Customization from the admin menu.

This will to the theme customization interface a.k.a WordPress Customizer, which looks like this.
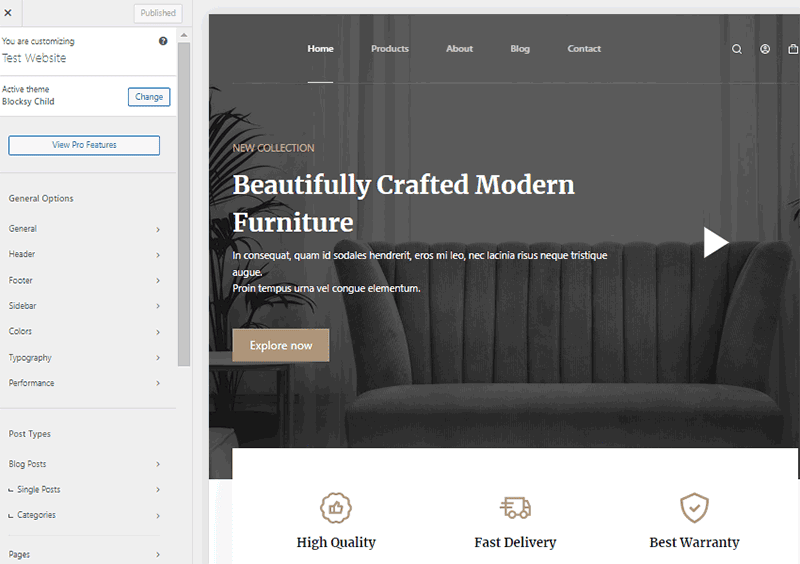
Once inside the WordPress customizer, you can see a sidebar containing a menu with different options like General, Header, Footer, Post layout, etc. There are more if you scroll down below.
The center of the interface is our home page. Here, you can open different pages and see the changes made in real-time.
Now, we will see each of the menu options on the left one by one.
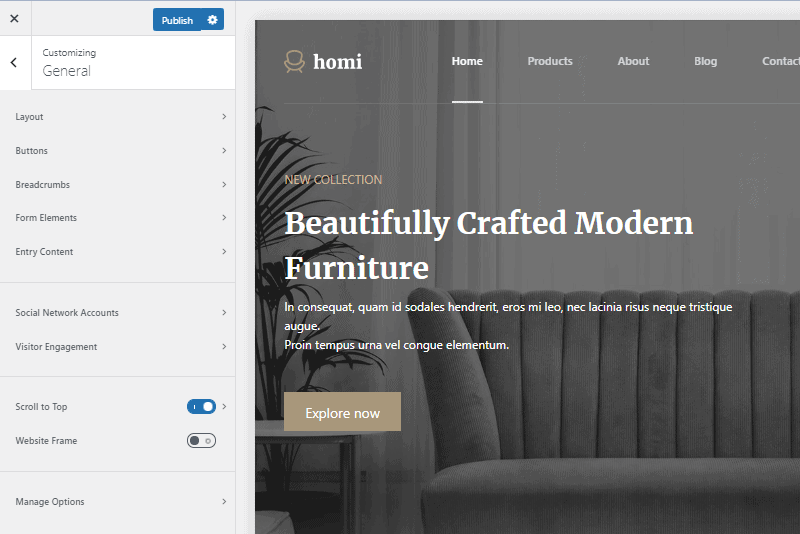
1. General
On the General menu, you have lots of different other configurable options like layout, buttons, breadcrumbs, social links, and more.
You can click on each of the options to customize them.
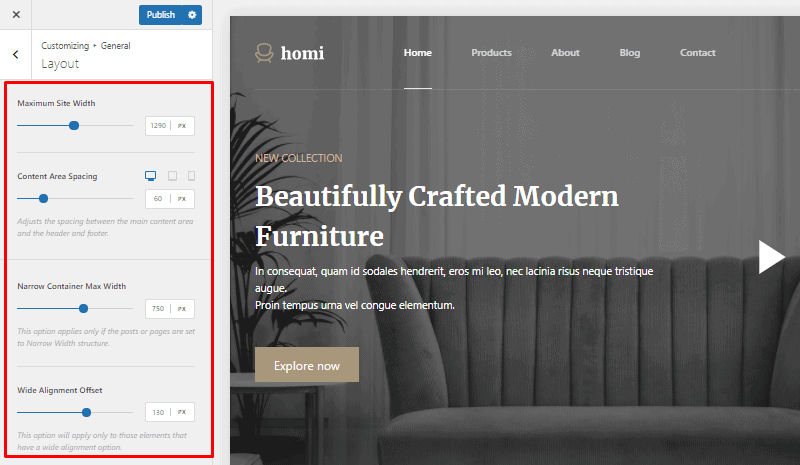
i. Layouts
Here, you can configure the following things.
- Maximum site width – set the maximum width of the website for desktop.
- Content Area Spacing – set space between content on your posts and pages.
- Narrow Container Max Width – set the width of a narrow container (a type of post/page container)
- Wide Alignment Offset – control the extending of the blocks using the wide alignment option so that they will stay inside the container in Gutenberg editor.
ii. Buttons
Here, you can configure the buttons that appear throughout your website.
Firstly, you can set the minimum height and enable/disable the hover effect of buttons from the General tab.
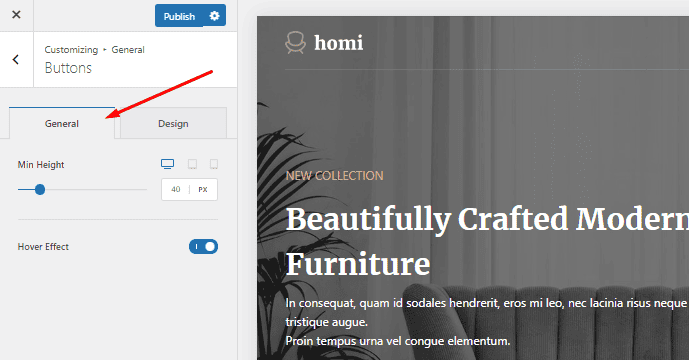
Then, you can enter the Design tab for configuring the styling of the button. There, you’ll find options like font color, background color, border, padding, and border-radius.

iii. Breadcrumbs
Under here, you can configure how the breadcrumbs appear.
Under the General Tab, you can manage
- Separator – Select the appropriate page separator in the breadcrumb.
- Home Item – Select text or home icon for referring Home in the breadcrumb.
- Home Page Text – If you select the text, then type in the text that indicates Home.
- Current Page/Post Title – Show or hide the current page or post in the breadcrumb
- Current Taxonomy Title – Show or hide the current taxonomy in the breadcrumb

And, under Design Tab, you can configure font type, size, design, and breadcrumb font color.

iv. Form Elements
This will let you design how the form looks on your website if you have placed forms on your web pages.
You get to choose the form layout, font color, font size, border color, background color, border size, and much more.

v. Entry Content
Here, you will find the options to manage content spacing, enable left & right block offset, and select links type.

vi. Social Network Accounts
Here, you can enter the links to your social media accounts that will be displayed throughout the website. It has separate text fields that let you add links to over 50 social media accounts.

vii. Visitor Engagement
This option makes it easy for your site to integrate with Google Analytics. Here are the available settings.
- Enter tracking code – Enter the tracking code of Google Analytics v3 or v4 at the appropriate text field.
- IP Anonymization – Turn it on if to anonymize the IP address of users. This might be required by the privacy rules of different countries.
- Schema.org markup – Switch it on to enable schema.org markup featured on your website.
- OpenGraph Meta Data – Toggle it on to enable OpenGraph rich metadata on your website.

viii. Scroll to Top
Enabling it will add a button at the bottom of your pages/posts that takes users to the top of the page.
Also, clicking on it will open different options. Under the General tab, you can choose scroll-to-top arrow, button shape, size, margin, alignment, and visibility on different devices.

And, under the Design tab, it lets you choose the icon color, background color, and create the button shadow.

ix. Website Frame
Switching it on will add a frame around your website layout. Inside it, you’ll see the options to set frame size (in pixels) and color.

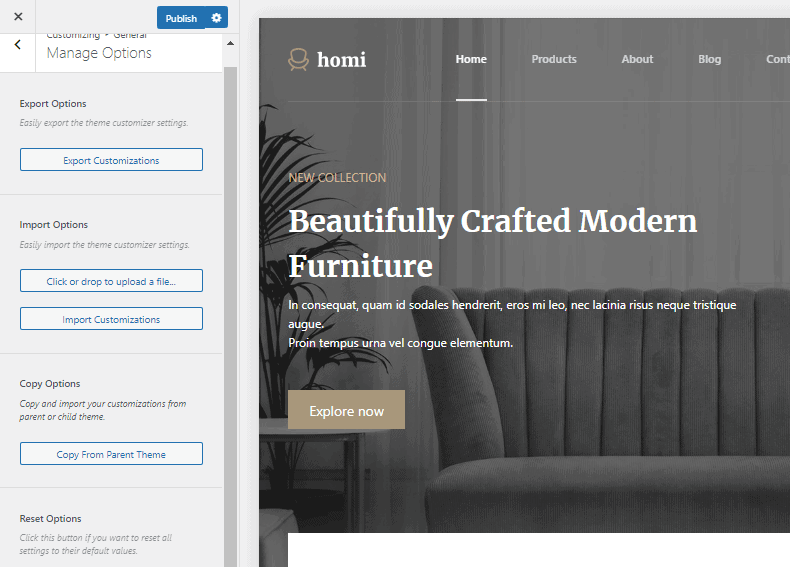
x. Manage Options
In this menu, it has the option to import or export the website theme settings and customizations. Here you can –
- Export Customizations – It will export the customizer settings of the current website into a file.
- Import Options – It lets you browse and choose a local file containing the customizer settings.
- Copy Options – It will let you copy and import customizer settings from parent or child themes.
- Reset Options – If you want to reset all the customizer settings, then click the button ‘Reset Options’.
2. Header
The header menu of the Blocksy theme lets you design the header structure for desktop and mobile. Firstly, you get a lot of elements to place on the page header with the header builder. Also, you can give your header different features like sticky, transparency, conditional display, etc.
When you click on the header from the customizer menu, you’ll reach the header builder interface.
On the left, you’ll see 2 different tabs – Elements and Headers, useful for designing your header as you like. Let’s see both of them.
i. Elements
Under the Elements tab, you can see a lot of elements that go on your header.

You can just drag and place the elements in different positions at the header builder below. Also, there are 3 different rows on the header so, place the elements in any row you like. Here is an example.

Now, you also get to edit each of the elements individually by just clicking on it from the header builder below. Just click on the element there and the editable options will show up on the left.
For example, we clicked the button element and edited its layout, texts, and some other settings.
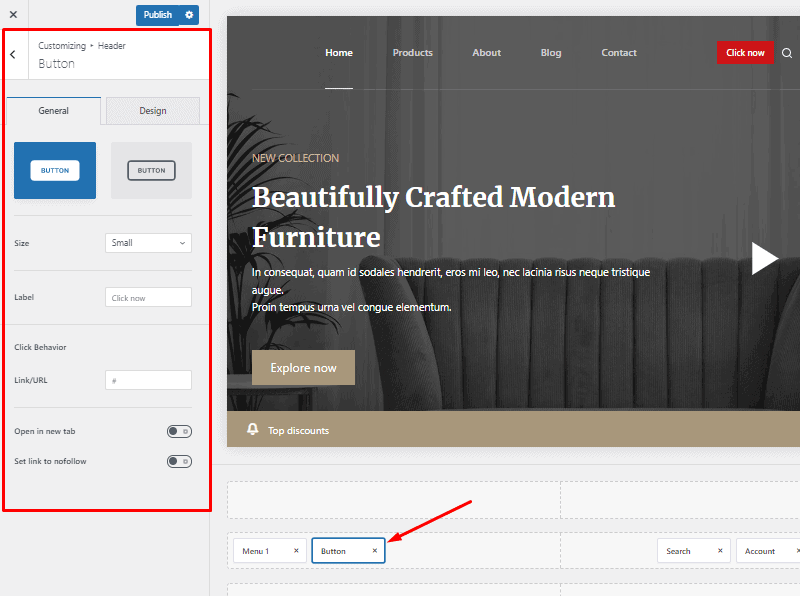
You can try editing different other elements as well.
ii. Headers
The Headers option lets you select a header and customize its various settings. Here, we only have the option for editing the Global Header (a primary header for all pages). So, click on it and configure.

It has the following settings.
- Sticky Functionality – You can turn on/off the sticky header feature, choose which ones of the 3 header rows to make sticky, choose a sticky effect, and enable/disable it on mobile and desktop devices.
- Transparency Functionality – It has the toggle button to enable the header as transparent. Also, it lets you choose conditions for the header to become transparent. Also, you can enable or disable it for mobile and desktop devices.

iii. Mobile Header
Another great feature of Blocksy – it lets you configure how the header appears on mobile. For that, just click on the Mobile Header tab at the bottom of the Header builder.
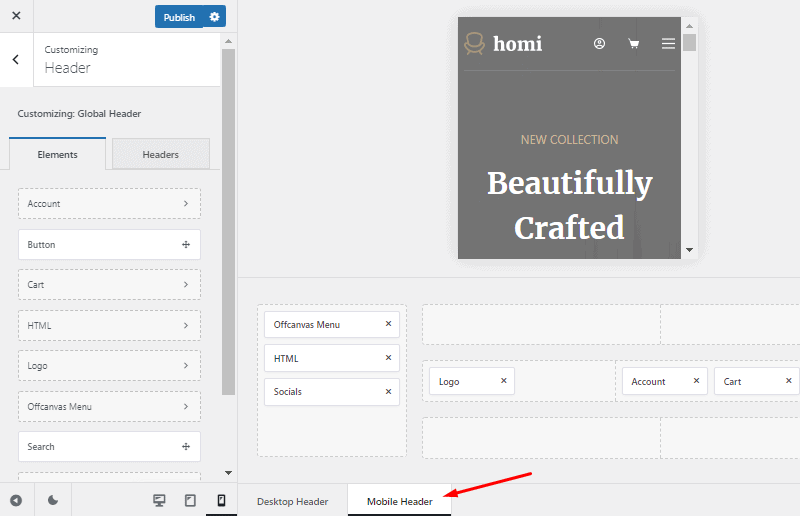
Creating the header for mobile is pretty much similar to that of the desktop – just drag the elements and drop them in places you like.
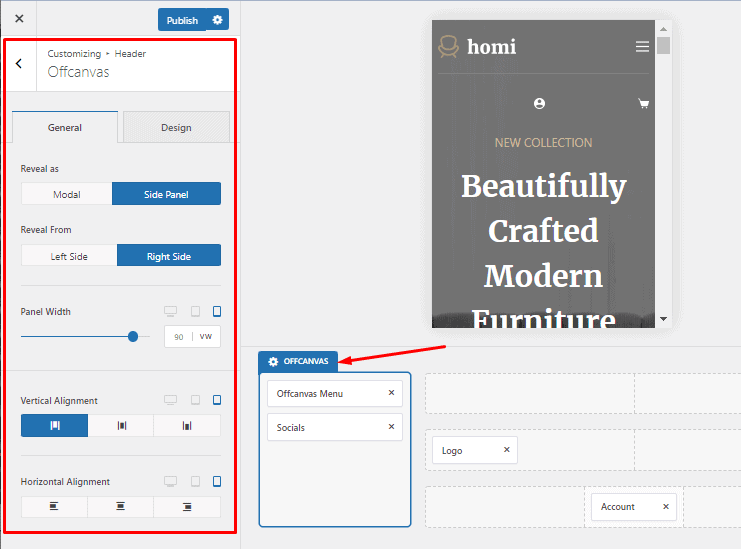
Plus, you’ll have the off-canvas menu (a menu that reveals on a button’s press) that you can customize easily. Mobile responsive websites should have off-canvas menus so that they will adjust the available width of the mobile devices.
Now, Blocksy makes It easy to create off-canvas menus. You can choose what to keep in the regular header and what in the off-canvas menu.
3. Footer
Similar to header builder, Blocksy has the Footer builder to design the website footer as you like. Just click on the Footer on the customizer menu and you’ll see the available options.
It has 2 tabs – Elements and Footers for designing the footer. So, let’s see them.
i. Elements
On clicking the Footer, you’ll reach the footer builder interface. On the Elements tab, you have all the elements that you can drag and place on the builder below.
The elements can be moved around and placed in different locations on one of the 3 footer rows.
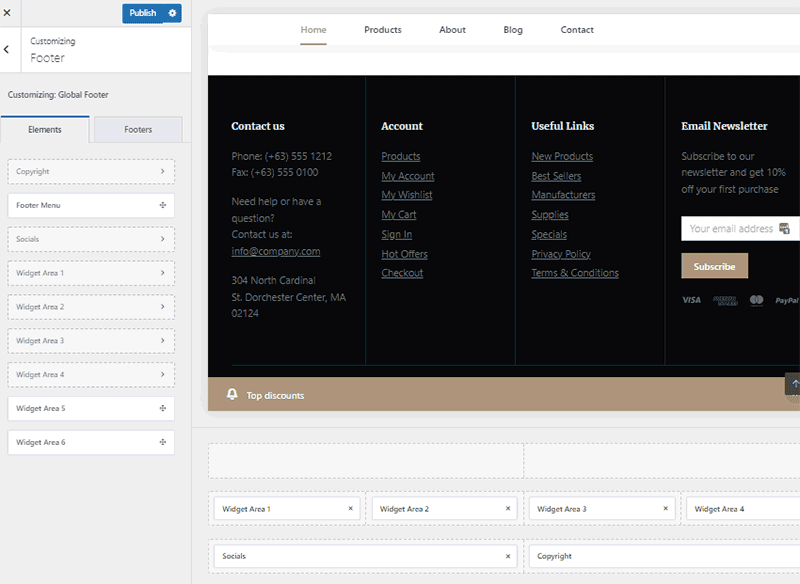
If you want to make edits on the footer, just click on the element. Then, the editable options of the element will show up in the left bar.

ii. Footers
From the Footers tab, you can select the footer and customize its various settings and styling. Here, we only have the Global Footer (a footer for all pages). So, you can click on it to see the available edits.

It offers the following settings.
- Enable reveal effect – It lets you add a reveal effect to the footer for different devices. Also, you can choose a shadow color for the reveal shutter.
- Footer Background – Here, you can choose the background color for the footer.

4. Sidebar
Here, you can find the settings for the sidebars appearing on your website.
It has 2 tabs – General and Design. Let’s see them both.
Firstly on the general tab, you get to choose a layout from the available 4 sidebar designs. Also, there are options for adjusting the sidebar width, gap, and vertical spacing. Moreover, you can enter the heading tag for the widget title – H1 to H6.
If you want to make the sidebar sticky, then there’s the toggle button to turn it on or off.
For mobile devices, you can choose to show/hide the sidebar and also decide whether you want it to display at the top or button of the page.
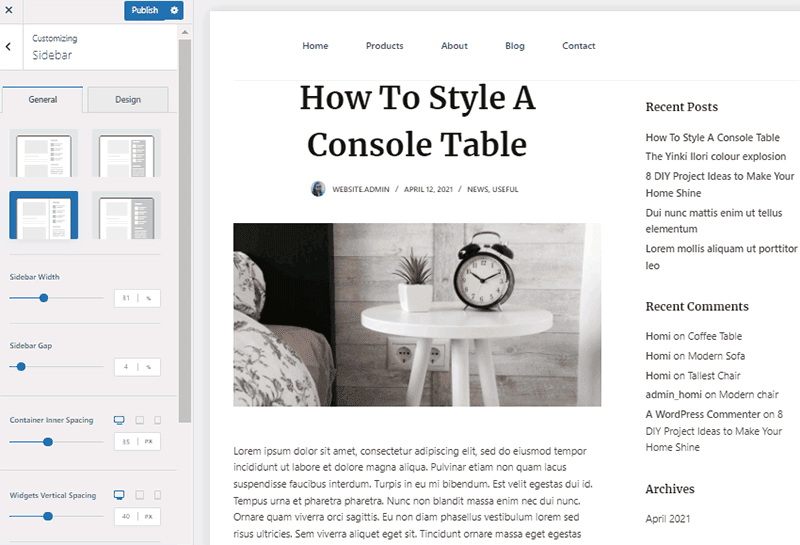
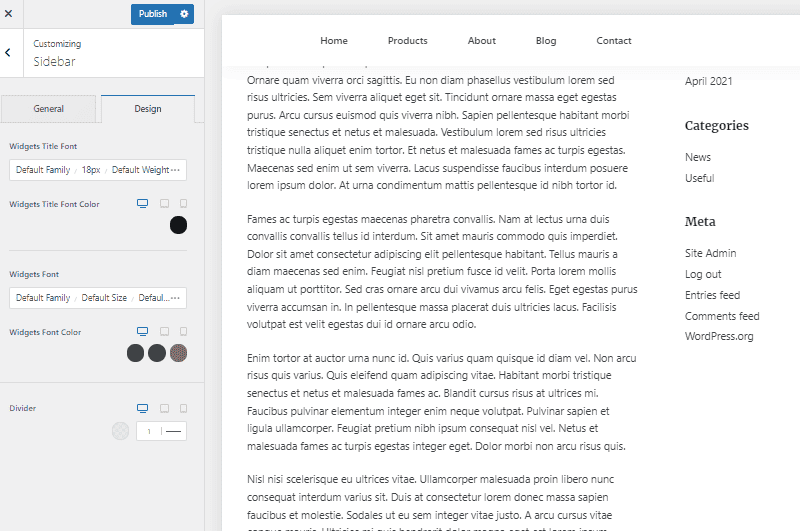
On the Design tab, it has basic options like font title, size, weight, and color for widget title and regular text.
4. Color
It’s the section where you can give your website a unique appearance with colors.
You’ll see different elements on your website with their colors here.
Firstly, it has a global color palette where you can pick 8 different colors for your website. Those 8 are the major colors on your website.
Also, you can choose the global colors for elements like text, links, text section, borders, headings, and site background.

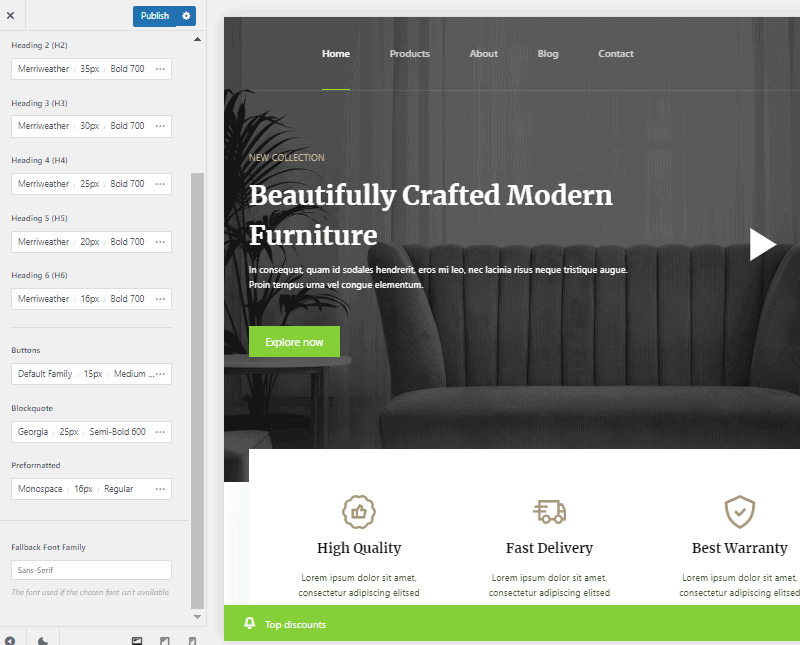
5. Typography
Here, you get to choose the font and styling of different texts on your website.
To be more precise, you get to configure – the font type, font size, and weight for the texts for base text, headings (H1 to H6), buttons, blockquote, and preformatted text.
If you click on the 3 dots on the side, there are more options like line height and letter spacing.
6. Performance
Generally, websites use heavy codes and scripts for adding designs, animations, and special effects. That will make your website beautiful but degrades the performance. With Blocksy theme, you get different options to enhance the website performance; basically by disabling those styling options.
Let’s see them
- Dynamic SS Output – Firstly, you get to choose from where to load the dynamic CSS (a code that determines web page styling) – file or inline. Choosing ‘file’ is strongly recommended.
- Disable Emoji Script – If you don’t want to display emoji on your website, then disable this option.
- Lazy Load Images – It’s a feature that makes your images to load at last while other elements of the pages have loaded. Enabling the feature will boost up your website performance. Also, you can choose the animation before the images are loaded.

7. Post Types – Blog Post
The Post Types menu item has the settings and adjustable factors that help you design the structure and layout of different WordPress post types. Basically, the post types are posts and pages.
On the Blog Post menu, you’ll have tons of different options for blog archive pages.

So, let’s see the settings available.
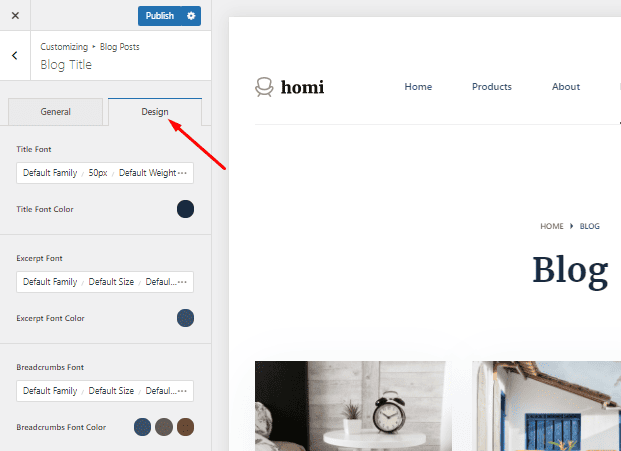
i. Blog Title
Firstly, you can choose to display or hide the blog page’s title with a toggle button. If you turn it on, then you can click on it to see more options next.
On the General tab, you can choose the title design from 2 different available options first.
Similarly, you can show or hide the blog post elements – Breadcrumbs, Title, and Excerpt. Just click on the eye button you see along with it. Moreover, you can find other configurations like spacing, width, heading tag, etc. for title and excerpt.
Also, there are more options like the alignment of the blog page title and container bottom spacing. Arrange them as you want.

Now, on the Design tab, you have the basic settings for managing the font, typography, and colors for the title, excerpts, and fonts.
ii. Blog Structure
Next, you have the blog structure settings. You get to choose from 5 different structures for the posts appearing on your blog page.

Also, you can choose the number of posts per column if you choose a grid structure. Also, you can set the number of posts appearing per page.
iii. Card Options
Next, you have the Card Options. It determines how each post appears on the blog post page.
On the General tab here, you can choose the card structure – simple, boxed, or cover. Also, it lets you choose to hide and arrange different elements in the order you like.
There are more options like spacing, alignments, gaps, etc. to adjust the content of the cards as you want.

On the Design tab of the card options, you can manage the font, typography, and color for the cards. Also, it lets you choose the card background color, border, shadow, and border’s radius.

iv. Page Elements
Here, you’ll have additional options like managing sidebar and pagination.
For the sidebar, it lets you allow or disallow the sidebar on your blog archive page. If you allow it, then it asks the position of the sidebar – left or right.
Likewise, it allows you to enable or disable the pagination. If you have a large number of posts, then the pagination adds a next button or numbers to take users to more posts’ lists.
So, after you enable the pagination, then you’ll see more settings inside it.
From the General tab, you can choose pagination type, and select the visibility of numbers and next-arrows on different devices.

And, on the Design tab, you can choose the colors for the pagination items. Also, you can choose and use a divider if you like.

v. Functionality Options
Lastly, you have the Functionality Options, where you can activate the Cards Reveal Effect with the toggle button. With that, it will add an animation effect to posts while you load the post archive page.

8. Single Posts
Next, we have the configuration for the single posts. Let’s dive into it and see the customizable options.

i. Post Title
It decides how each post title appears on the single post page.
Firstly, on the General tab inside Post Title, you get to choose the post layout among the 2 options. Moreover, it has the option to enable or disable title elements like breadcrumbs, title, excerpt, and post meta.
The horizontal alignment lets you place the heading at left, right, or center. While the container bottom spacing can help you add space below the title area.

And on the Design tab, you get to manage the font type, size, weight, and color for title, meta, and breadcrumbs.

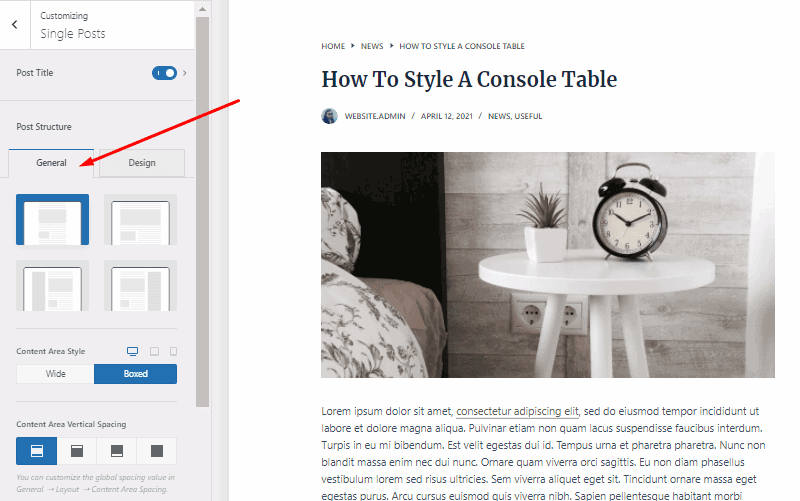
ii. Post Structure
Next, you get to configure the whole post structure from the settings here.
Firstly, the General panel lets you choose from 4 different post structures for your posts. Moreover, it has the option to choose the content area between wide or boxed.
Next, on the Design tab, you can adjust the additional post structure with settings like page background, content area background, content area shadow, content area padding, etc.

iii. Post Elements
Here, you will find a list of different elements like featured images, tags, share box, author box, etc. that you can enable or disable on your posts.
After enabling the elements, you can find more configurable options on clicking.
For example, the featured image has options like image ratio, image size, image location, etc.

iv. Page Elements
If you want, you can also add other elements like related posts and comments to the single post page. You can do it by just switching on the toggle button.
More options are available for each page element once you have activated them.

9. Categories
Next, we have the configurations for the blog post categories. Basically, it has the option to choose the structure of the post’s card on the Categories page.
i. Page Title
Firstly, you can choose to show or hide the title of the category page with a toggle. After turning it on, click on it to see the categories page title options.
On the General tab inside Post Title, you can choose the layout for the page title appearance. Moreover, it has the options to enable or disable title elements like title, description, and breadcrumbs.
Also, it lets you choose the horizontal alignment for placing the title at left, right, or center. Whereas, the container bottom spacing lets you add space below the title area.

If you want to edit the font and typography options for the categories archive page, then go to the Design tab next to General.
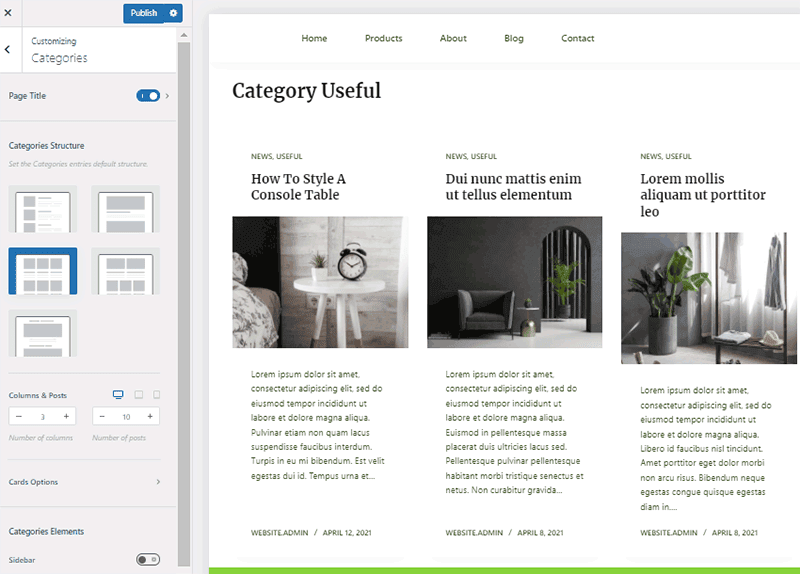
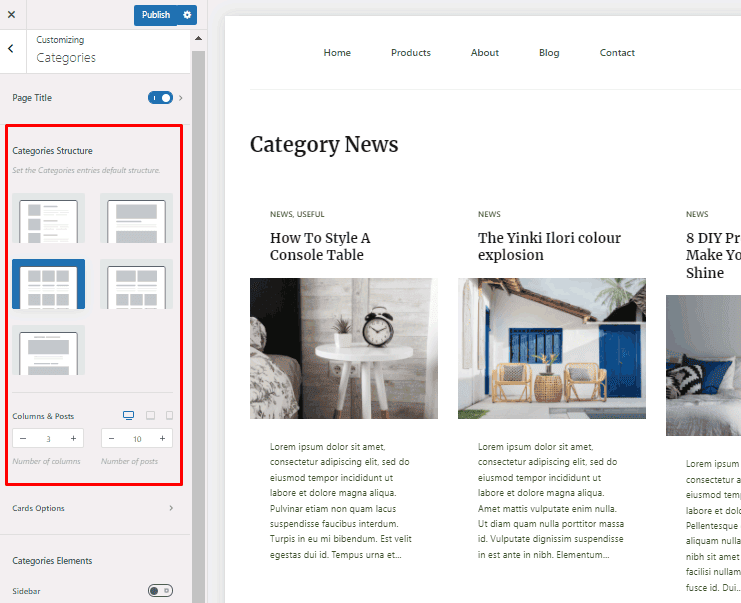
ii. Categories Structure
Here, you’ll find the options to configure the structure of the categories page. Firstly, it offers 5 different layout options for displaying the cards (layout of posts on archive pages) on the categories page.
If you select grid layout from the layout options, below you can enter the number of columns per row. Also, you can enter the number of posts per page.
iii. Card Options
On the Card Options, you can manage how each card appears on the category archive page.
On the General tab, you can choose card type – simple, boxed, or cover. Also, it lets you choose to hide and arrange different elements in the order you like.
Moreover, you can manage spacing, alignments, gaps, etc. to adjust the content of the cards.
On the Design tab of the categories > card options, you can manage fonts, typography, and colors for the title, excerpt, and meta font of the cards. Also, you can set the featured image radius and bottom divider of the card.

iv. Categories Elements
At last, there’s the option called Categories elements. Under it, you can see the option to toggle on or off the sidebar on the category archive page.
10. Post Types – Pages
On the Page menu, you’ll have tons of different options for managing the appearance of single pages.
So, let’s see the settings available.
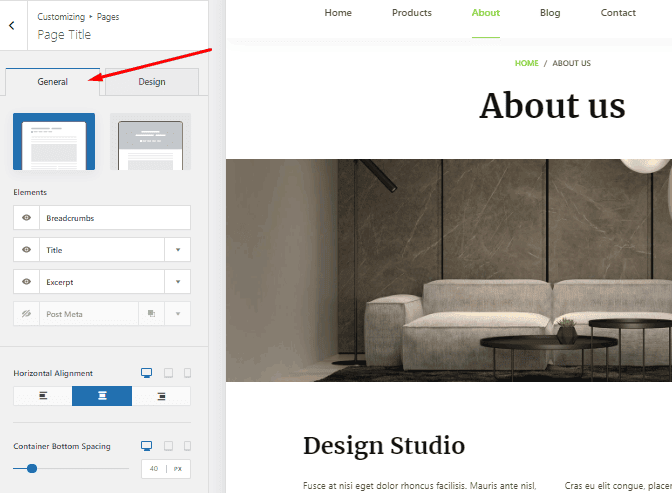
i. Page Title
Firstly, you can choose to display or hide the page title with a toggle button. If you turn it on, then you can click on it to see more options next.
On the General tab inside the page title menu, you can choose the title design from 2 different available options first.
Similarly, you can show or hide the page title elements – breadcrumbs, title, post meta, and excerpt. Just click on the eye button you see before it. Moreover, you can find other configurations like spacing, width, heading tag, etc. for title and excerpt.
Also, there are more options like title alignment and container bottom spacing. You can play around and arrange them as you want.
Now, on the Design tab, you have the basic settings for managing the font, typography, and colors for the title, excerpts, and fonts.
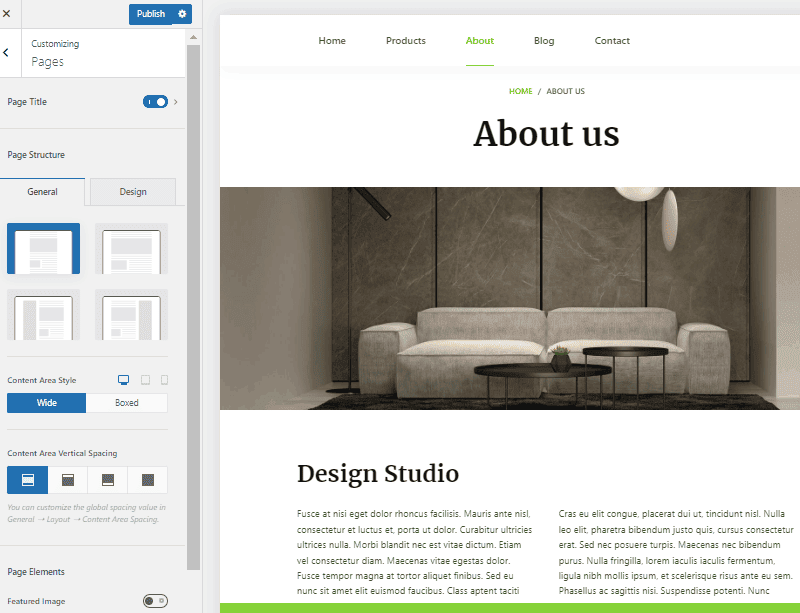
ii. Page Structure
On the General tab under Page Structure, firstly it lets you choose from 5 different structures for the posts appearing on your blog page.
Next, you can choose content area style (boxed or wide) and choose vertical spacing for content.
iv. Page Elements
Lastly, on the Page Elements option, you can enable or disable Featured Image and Comments for pages with a toggle button.
Recommendation: Comments are generally disabled on pages.

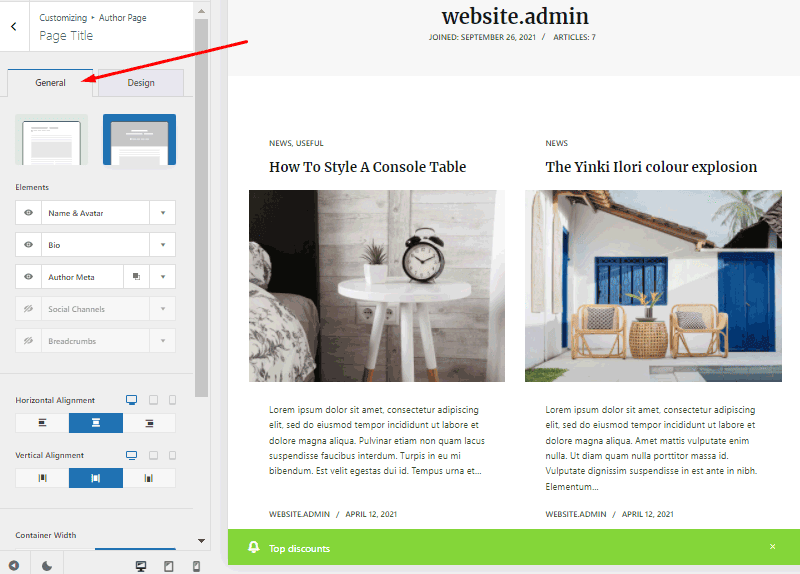
11. Author Page
The author page is an archive page that lists all the posts published by an author. Here, you can manage page title, author page structure, card options, and so on.

So, the available options are –
i. Page Title
The first thing to do is to display or hide the author page title with a toggle button.
After turning it on, you can click to see the settings for the page title.
On the General tab, you get to choose the appearance of the title, choose elements like name, avatar, bio, & meta to show or hide. In addition, you can fine-tune alignments, widths, heights, etc.
Similar to others, the author title’s design tab lets you configure title, fonts, background, and container padding.
ii. Author Page Structure
Back to author page settings, here you can choose the author page structure from 5 different layout designs. Also, you can enter the number of posts per column and page.

On the Card Options menu, you can find settings to configure the appearance of the cards (individual post on the archive page). You can choose card type, show/hide card elements, arrange card elements, tune card gaps, and arrange alignments.
Also, there’s the Design tab to set up the colors and fonts.

iii. Page Elements
Lastly on the page elements, you can choose to display or hide the sidebars on the archive page using a toggle. On clicking on it, you can choose the sidebar position – either left or right.
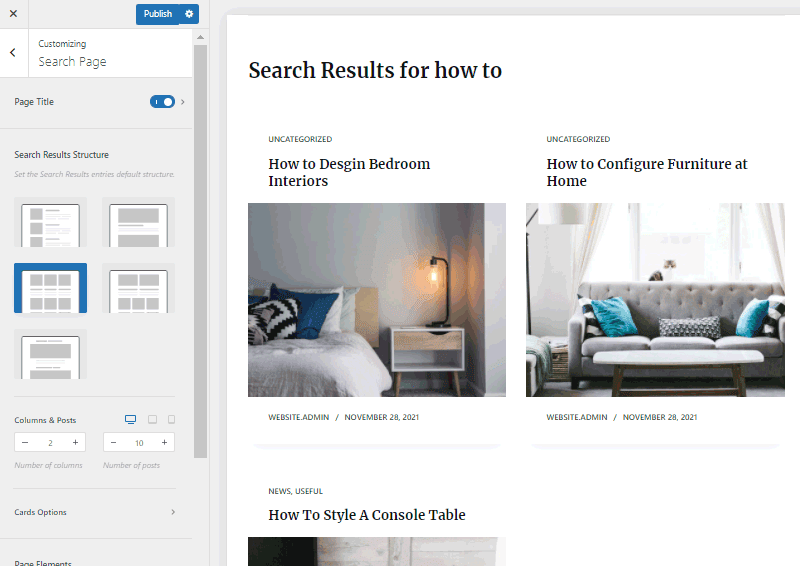
12. Search Page
The search page is the page that comes up with results after users search for a certain keyword on the search bar. The Search Page settings let you handle how the search page appears.
So, the available options are –
i. Page Title
Firstly, you can toggle on the button to show the page title. Next, just click on it to open the page title settings.
The General tab has features like page title design options, choosing elements to display, managing alignments, and spacing.

And on the Design tab, you get to customize the typography and colors for the title.
ii. Search Results Structure
Similar to other previous options, here you get to choose the layout of the search page. Also, you can enter the number of posts per column and page.

The Card Options menu lets you handle the appearance of the cards on the search page. Basically, you can choose from 3 different card types for appearance, choose elements on the card, card gaps, etc.

Also, there’s the Design tab to set up the colors and fonts.
iii. Page Elements
On the Page Elements, you have the option for the sidebar. Just turn it on or off using the toggle button to show or hide the sidebar on the search result page.
iv. Functionality Options
Currently, you can see the ‘Live results’ listed under the Functionality Options. If you have switched it on, then the results of the search will be displayed in real-time i.e. without loading the page.
13. Site Identity – Core
From this option, the options are related to the core of your website.

When you open the Site Identity menu, there you can see the option to add 3 different things –
· Site Title – Enter the title (name) of your website.
· Tagline – Here, you can enter the short one-liner description for your website.
· Site Icon – Upload the icon for your website.

14. Menus
On the Menus options, there are some quick options to manage the menus on your website. While you’ll find detailed configurations on Appearance > Menus.
Anyway, you’ll see the available options after clicking on the menu.
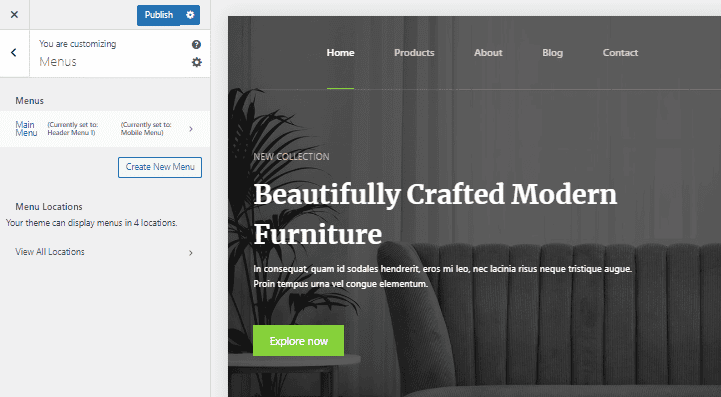
Firstly, you can see the list of menus on your website from here. For now, we only have the main menu. So, click on the main menu to customize it.
There, you can manage options like naming the menu, ordering items on the menu, and choosing the location for the menu. If you want, you can also delete the menu by just clicking on Delete Menu you see at the bottom.

Besides, other options on the Menus are creating new menus, viewing menu locations & choosing the menu for each location. The Blocksy theme offers 4 different locations for adding menus.
15. Widgets
Basically, the Widget menu lets you manage widgets appearing on different pages.
Blocksy offers 2 areas that you can add widgets to – the sidebar and the footer. And note that, there are 6 positions on the footer for the widgets.
Anyway, here, we are editing the sidebar – one of the widget areas.
After you go to Widgets, click on the Main Sidebar to edit it.
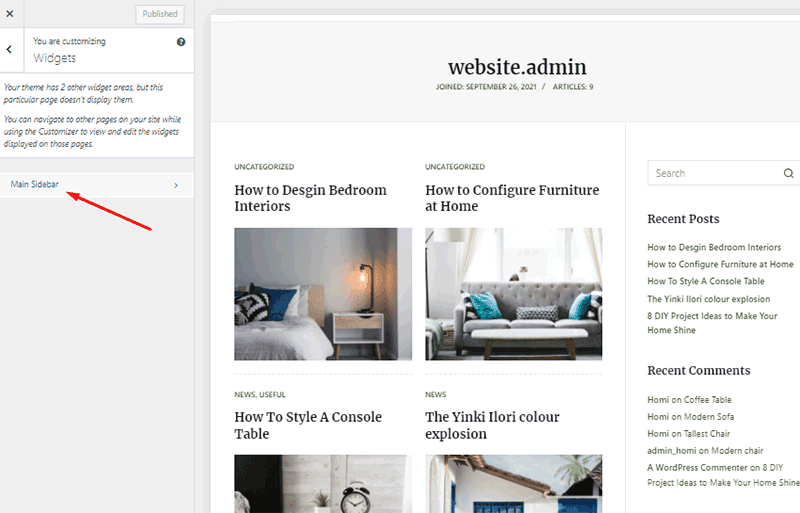
Note that the option for clicking the Main Sidebar option only appears when the page you are currently opening on the editing interface consists of the main sidebar.
Now, there you can configure the sidebar widgets as you like. It’s the same as managing widgets from the Appearance > Widgets menu. Just edit the existing widget by clicking on it. Or add new ones by clicking on the plus (+) button.

16. Home Page Settings
Here, you can choose what your home page displays – either a static page or the blog page.
Normally, websites create a static page and choose it to display on the home page.
Next, you can specify what pages to assign as Homepage and Posts page.

17. Additional CSS
If you further want to customize your website with CSS codes, then here’s the option to do it. Just click on Additional CSS and type in or paste your code here.

Wrapping Up
There you have it! We have come to the end of the tutorial on customizing the free Blocksy theme.
We have tried to cover everything starting from installing the Blocksy theme to configuring all the settings available on WordPress Customizer. This will make it easy for you to go through Blocksy. But, the only way you are going to know all of it is by doing it yourself.
To be honest, Blocksy is one of the best themes we have ever used. Even the free version of Blocksy has the most features for customizing the website as you like. We won’t feel surprised if it becomes the most popular WordPress theme over the years.
If you are new to WordPress, then you should check our comprehensive WordPress Tutorial. There we have covered the ins and outs of WordPress that will help you with the WordPress journey.