The tools and plugins recommend in the site are the ones we use, have tried or tested ourselves and recommend to our readers. Marketing With WP is supported by readers like yourself. If you take an action (such as a purchase) we might earn an affiliate revenue at no extra cost to you.
How to Add Google Analytics 4 (GA4) tracking code to WordPress Website
WordPress users have the option to add Google Analytics tracking 4 code on the WordPress website and access the Google Analytics platform on the standalone platform.
For site admins who use Google Site Kit plugin, there is limited insights and data displayed on the dashboard. Using the standalone platform of Google Analytics is a much better option to access deeper user insights.
To add the Google Analytics 4 tracking code, you can either –
- Modify the theme file to insert the tracking code or
- Use a plugin to insert the tracking code
Add Google Analytics 4 tracking code to WordPress
There are currently two versions of Google Analytics – Universal Analytics and GA 4. The Universal Analytics is the older tracker that focuses more on sessions and page views. The newer GA 4 is more focused more towards users and their journey.
In this guide, we will show you how to set up GA 4 in your Google Analytics account, and then Add the tracking code to your WordPress website.
Step 1: Signup with Google Analytics
To connect Google Analytics with your website, the first thing you need to have is a Google Analytics account. Creating one is easy – you need to have is a Google Account (which everybody has).
So, go to Google Analytics, and sign in with your Google account.

After successful signup, you’ll reach a page just like the one below.

Click on the Start Measuring button to continue.
Step 2: Setup your Google Analytics Account
The next step is to set up your account. On the next page, it will ask you to enter your account name.

On clicking on Next, it’ll ask you to enter more details i.e. property name, location, time zone, and currency. Enter your details accordingly. You can also change these settings later.
After done, click on Next.

Then, fill in your business info like industry category and business size. Below that, tick the boxes according to your preferences for the Google Analytics features you want to use.

Finally, click on Create at the end of the page.

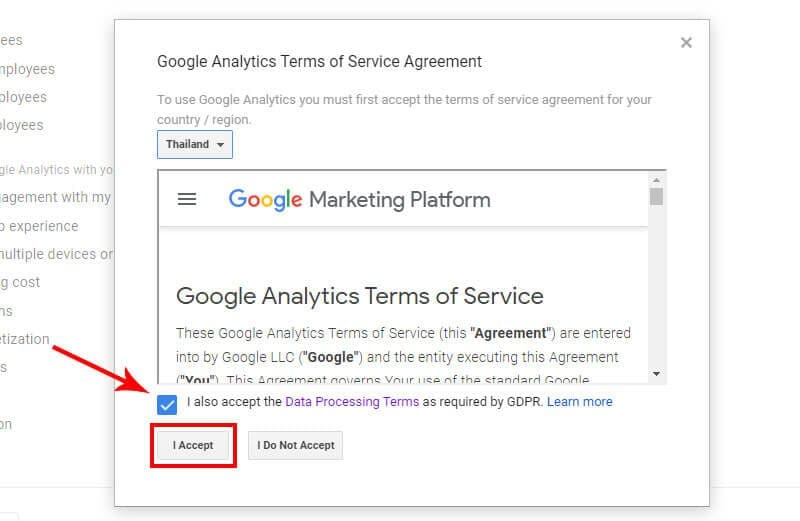
After that, a dialog box will pop up to accept the terms and conditions. Just select your country and accept it to move to the next step.
It’ll take a few seconds to get it ready.
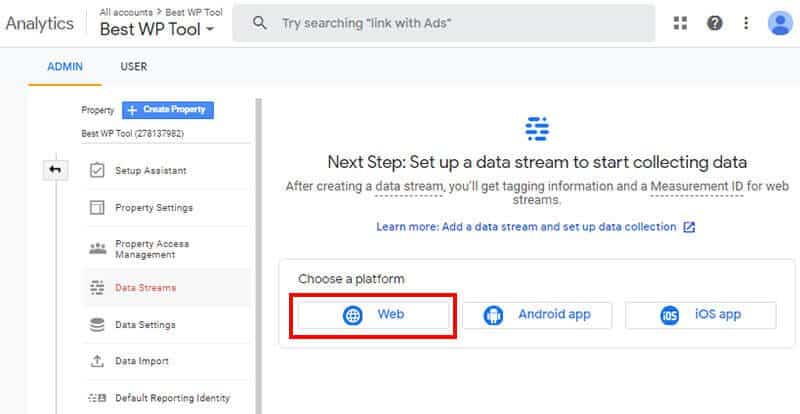
Step 3: Setup your data stream
As soon as your account is created, it asks you to choose a stream type. You can choose from the options – Web, iOS, and Android. From there, select the Web option as you’re using it for your website.
Now, another screen pops up to enter your website URL and name your stream. Make sure you pick the right URL prefix too – ‘http://’ or ‘https://’. After that, click on the Create stream button.

After doing so, you’ll get your stream details like measurement ID, global site tag, etc. on your next page.
Once the stream is created, you can copy the Global site tag (gtag.js) from the “Web stream details” section.
Step 4: Find GA4 Tracking Code and Copy the Global site tag code from data stream
Once the stream is created, you can copy the Global site tag (gtag.js) from the “Web stream details” section.
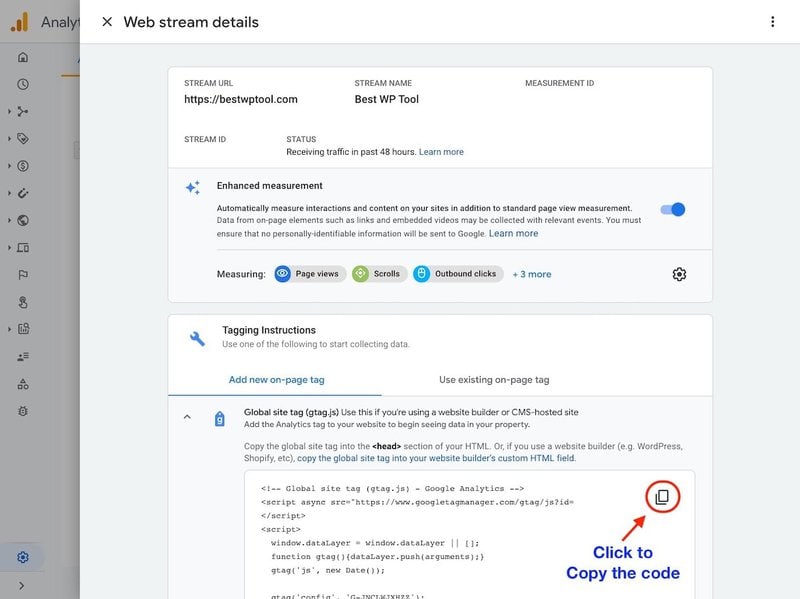
Once you copy the tracking code, you need to paste the tracking code in the header section of your website.
Step 5: Install a WordPress Plugin to insert GA4 tracking code
The next step requires adding a tracking code to your WordPress website.
When you access your website source code, you might mess it up if you don’t know what you’re doing. Therefore, we recommend using a plugin to insert the GA4 tracking code.
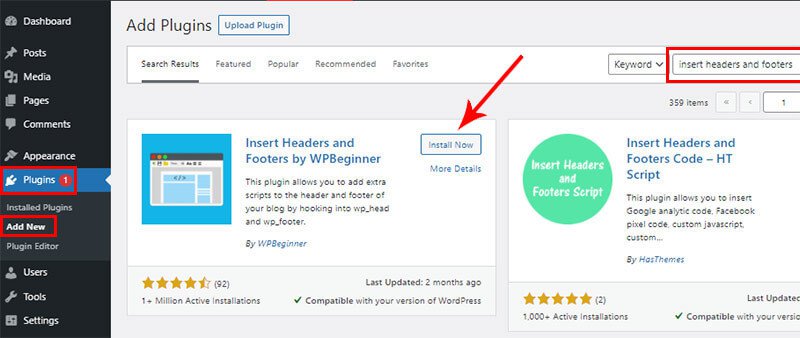
Here we are using the plugin ‘Insert Headers and Footers’.
If you use SEOPress WordPress SEO Plugin, we have a tutorial on how to add the tracking code using SEOPress.
So, leave the current GA4 tab as it is and open a new tab.
There, log in to your WordPress dashboard in a new tab. Then, go to
Plugins >> Add New
After that, search and install the plugin – ‘Insert Headers and Footers’.
Step 6: Paste the GA4 tracking code in the header section
Now, go to the WordPress dashboard again.
Then, go to Settings >> Insert Headers and Footers
Paste the Global site tag code from Step 4, from the data stream to the “Scripts in Header” section, and click “Save”.
After that, scroll down all the way to the bottom and click on the Save button.

Remember to clear your website’s cache after pasting the GA4 code.
Step 7: Verify if your GA4 tracking Code is working
Now the GA4 tracking code is placed in the header section of your website. The tracker should load each time your website loads a new page.
Note: Before you verify, please clear the website cache if you are using a caching plugin.
Next, open a new incognito window and browse a few pages of your website.
Then visit your Google Analytics account and check the Realtime statistic dashboard.

If your tracking codes were installed properly, then you will see the user activity in the Realtime dashboard.
Conclusion
That’s it. Congratulations! That’s all you’ll need to do to add Google Analytics 4 tracking code to your WordPress site.
If your website is relatively new, you should check out our article on most important things to install and set up on your WordPress website that helps new website owners get a jump start.
If you found our content helpful, then please help share our content. Also, follow us on Facebook for more updates.


