The tools and plugins recommend in the site are the ones we use, have tried or tested ourselves and recommend to our readers. Marketing With WP is supported by readers like yourself. If you take an action (such as a purchase) we might earn an affiliate revenue at no extra cost to you.
How to Display Google Sheets Data on WordPress Website Automatically?

One of the best ways to share information on a WordPress website is to present it visually in the form of a table. This post covers how to automatically sync and display real time Google Sheets data on a WordPress website step-by-step.
Google Sheets to WordPress Video Tutorial
Benefits of showing Google Sheets Data on WordPress Website
There are numerous benefits of displaying Google Sheets data on a WordPress website. Following are the ones stand out –
1. Enhanced User Experience
Information displayed visually in the form of a table or a chart makes it easier for readers to understand.
It provides a better user experience. When users interact with the website, they tend to stay on the site for a longer period.
2. SEO Friendly
Increased user experience and engagement have a positive impact on search engine optimization. As the time spent on the website increases, it sends positive signals to search engines to rank the content higher on search results.
Most importantly, search engines crawl tabular data and display it as featured snippets on the top of search results pages.

3. Real-Time & Relevant
Syncing data manually from Google Sheets to WordPress websites can be tiresome and redundant. Instead, you can save time and effort by automatically syncing data using a plugin.
More importantly, website visitors get access to the most recent and relevant information available due to auto-sync.
Pre-requirements
By default, the WordPress CMS does not have a built-in feature to display real-time Google Sheets data. A plugin is required to add this functionality to the WordPress website.
We recommend using Ninja Tables Pro because we use the plugin ourselves. Moreover, it is easy to use and implement on the site.

In order to display Google Sheets data on WordPress Website, the following is required:
- Google Sheets with the information you want to display
- Ninja Tables Pro or a similar premium plugin
How to display Google Sheets Table Data on WordPress Website Automatically
Following is the step-by-step tutorial
Step 1) Create a Google Sheets Spreadsheet
Go to https://sheets.google.com/ and click the New “+” sign. This will create and open a new spreadsheet.
Enter the data you want to be displayed on the website.
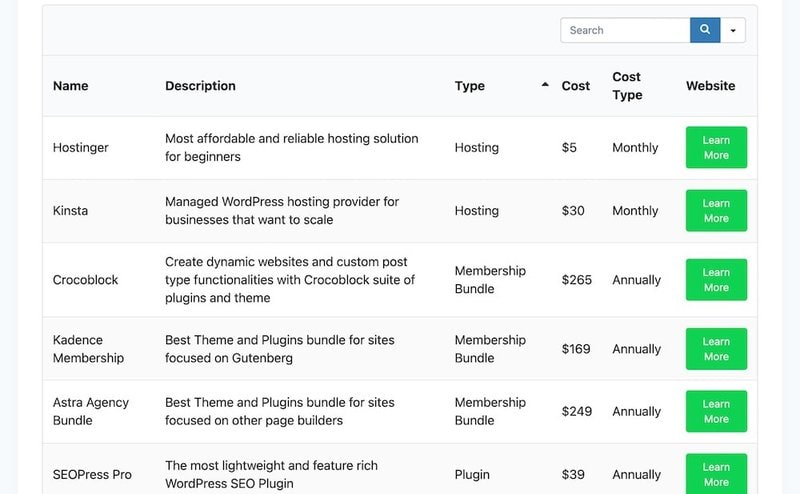
Once complete, the Google Sheets will look similar to this –

Our Google Sheet is a list of tools we believe are super helpful for WordPress website owners.
Step 2) Publish the Google Sheets online
For the Google Sheets data to be available online, it needs to be published to the web first.
On the Google Sheets,
Click on File > Publish to the web
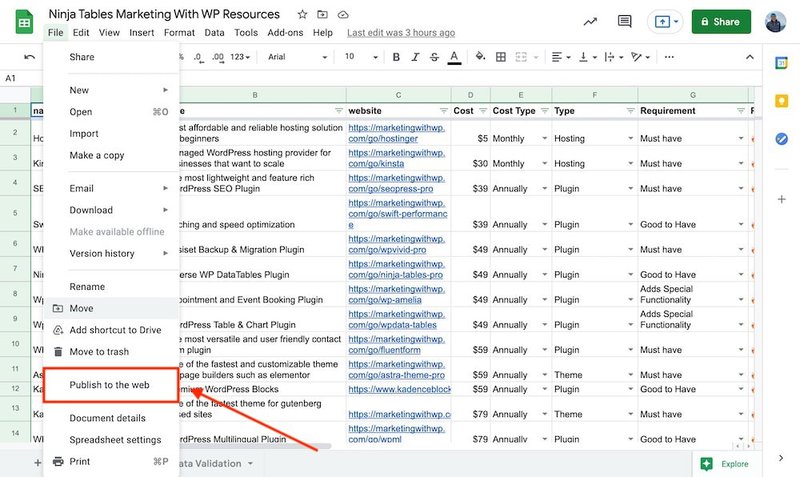
A pop-up box “Publish to the Web” will appear.

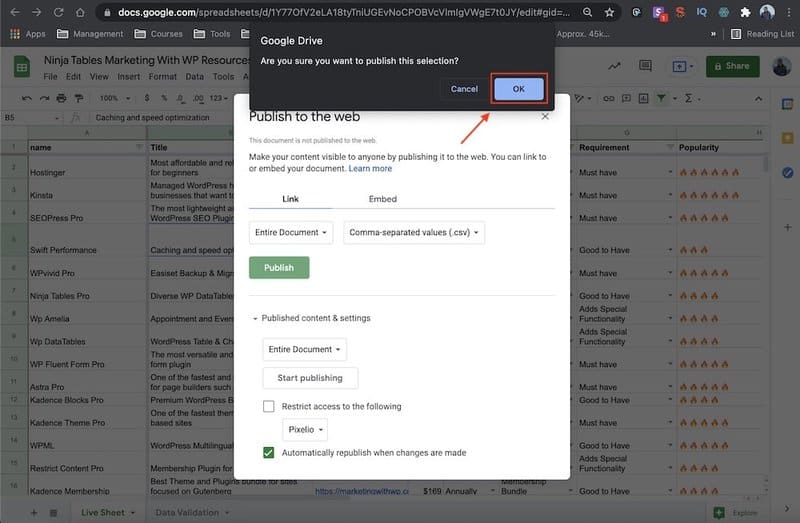
In the “Link” section, select the sheet you want to be published. In our case, we use “Live Sheet”.
Next, please select “Comma Separated Value (.csv)”
Before clicking on “Publish”, please check the settings under “Published content & settings”
Under “Published content & settings”, Select the checkbox “Automatically republish when changes are made”.
Selecting this option will automatically sync data between Google Sheet and the WordPress Website in a 5-minute interval.
Click the “Publish” button.
A new pop-up will ask you to make sure you want to publish. Click OK
Once Published successfully, A URL will appear.
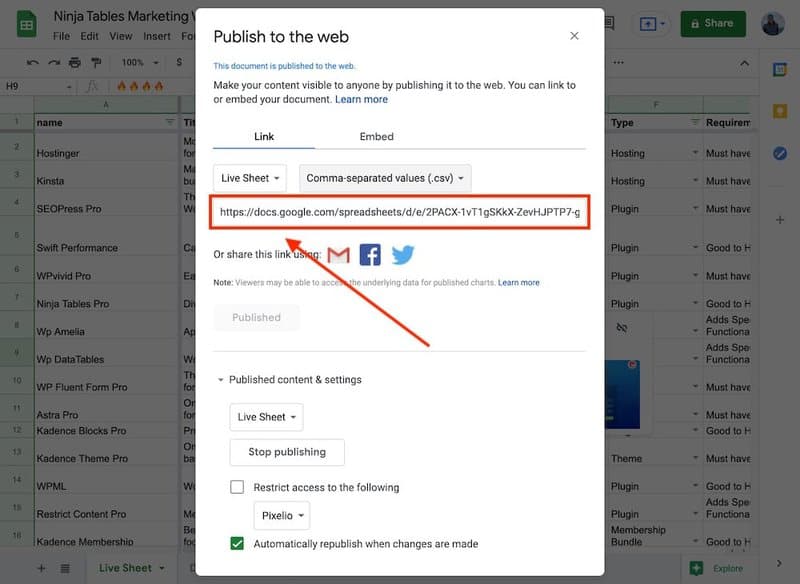
Copy this link – we will use it in Step 4 to create a table from Google Sheets.
Step 3) Install and Activate Ninja Tables
To add the Ninja Tables plugin, first log in to the WordPress admin area.
Then on the site’s dashboard,
Go to Plugins > Add New.
On the next page, the first thing you’ll see is a list of featured plugins. Search for the “Ninja Tables” plugin.

Click on “Install Now” to start the installation. It might take some time to complete.
Once the plugin is installed, Click “Activate”

Once activated, it’ll display the activation complete message. At this phase – the free version of Ninja Tables is installed.
As previously mentioned, the feature to display real-time data from Google Sheets is only available in the Pro version of Ninja Tables. Download your copy of the Ninja Tables Pro plugin and upload the plugin.
Go to Plugins > Add New

On the next page, you’ll see the Upload Plugin button at the top. Simply click on it.

Next, you’ll see a form to upload the plugin with the Choose File button.
Click on “File” and select the plugin from the local drive.
Once installed, Ninja Tables Pro will ask you to activate the plugin license. Activate it by entering your license key, then we can move to the next step.
Step 4) Create a Table and connect it to Google Sheets
The next step is to create a new table where the table data is sourced directly from the Google Sheets spreadsheet.
In the WordPress dashboard, go to Ninja Tables and Click “Add Table”

The pop-up window will show several options to create a table on the left menu bar.
Select “Connect Google Sheets” as seen below

Then, Enter the table name. Our table is named “Marketing With WP Resources”.
The “Data Source URL” field is for the Google Sheets link from the end of Step 2.
Paste the URL, then Click Next.
Step 5) Select the Fields
A new screen to select the fields from the Google Sheets will appear.
Select the entry fields to display on the table as shown below.

Click Save.
Ninja Tables has now created a new table with the Google Sheet as the source.
Step 6) Publish the Table
Although the table is created on the WordPress website, it is not published on the site.
Go to the page or post the table needs to be displayed on.
In our case, we want to display the table on our resources page.
To add the table, Add a new Ninja Table block.
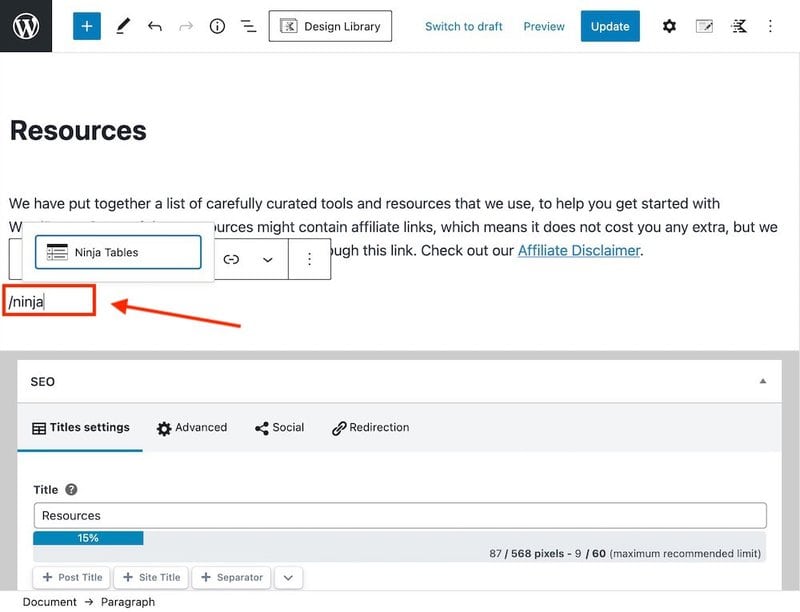
Select the Ninja Table, in our case it is “Marketing With WP Resources” table
Click Update or Publish on your Post or Page.
Visit the live page to test how your table looks.
To see the live example on the marketingwithwp.com website – you can visit our resources page.

Frequently Asked Questions
How to customize the Table?
Ninja Table allows various customizations options.
To make edits, go to Ninja Tables Pro > Tables > Edit

How to Edit the Table?
To edit the table, please make changes to the original Google Sheets spreadsheet. The Ninja Table you created will automatically update without having to make changes inside your website.
How long does it take to reflect the changes?
It takes around 5 minutes for the data to be synced and reflected on the website after making changes on the Google Sheets.


