The tools and plugins recommend in the site are the ones we use, have tried or tested ourselves and recommend to our readers. Marketing With WP is supported by readers like yourself. If you take an action (such as a purchase) we might earn an affiliate revenue at no extra cost to you.
How to Setup Google Search Console for WordPress Website

Every website needs traffic for generating leads, conversions, and sales. And, search engines like Google are the primary source of traffic for the majority of successful businesses online.
Setting up Google Search Console for your WordPress website’s is essential for your website’s content to show up Google’s Search Engine Results Pages (SERPS).
The Google Search Console is a free tool by Google that helps website owners rank their website content on Google’s search results. As a beginner, you might have no idea how to set up the Google Search Console tool in WordPress. But, WordPress makes it very easy for you! All you have to do is sign up with your Google account, enter your website URL, and verify your website.
To help you with it, we’re here with the easiest guide on setting up Google Search Console in your WordPress site.
Before that, let’s see why Google Search Console is a must-use tool for your website.
What is Google Search Console?
Google Search Console is a webmaster tool to help website owners understand how their content ranks and performs in the Google Search Engine Result Pages (SERPS).
Why use Google Search Console?
Google Search Console is a widely used tool by website owners, digital marketers, and SEO specialists to improve their website’s organic ranking and content marketing strategies. Moreover, it helps you monitor your site’s health, generate reports, and more.
With this tool, you can get insights like your popular web pages, search engine rankings, backlinks, and find out crawling errors on your website. These insights can help you improve and optimize your website to index and rank well in Google searches.
Learn more about Google’s ranking factors and how generate more organic traffic.
Here are some of the most important reasons to use Google Search Console.
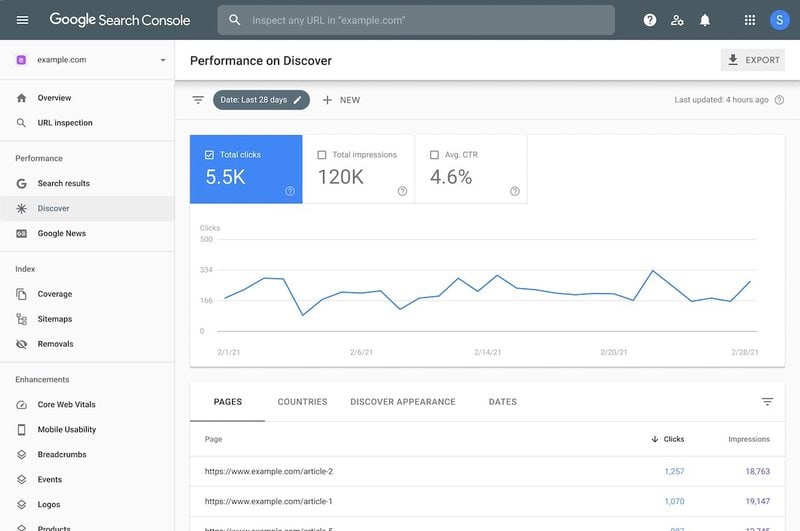
1. Track your Performance on Google
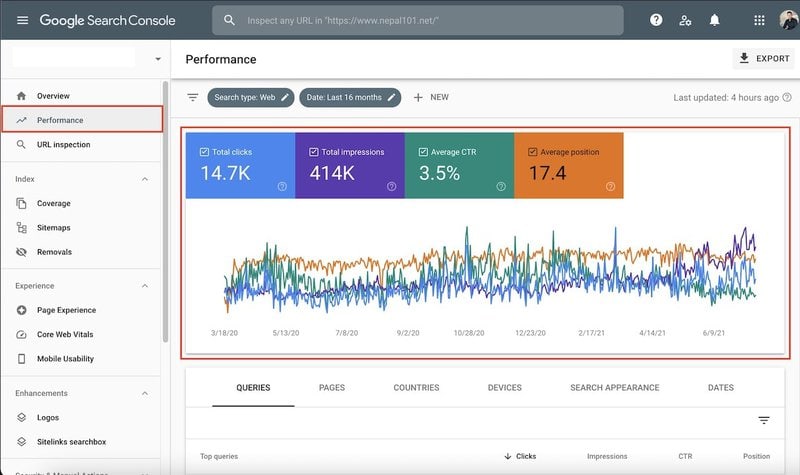
Google Search Console allows you to track how your content is performing on Google. It basically gives information on
- Clicks – How many times a web page is clicked.
- Impressions – How many times your web pages appeared in web search
- Click-through Rates (CTR) – The rate of clicks per impression of a web page
- Average Position – The average position of a web page for a particular keyword
In addition, it’ll also let you know about what search queries are bringing visitors to your website from Google.
These metrics are very helpful to understand how well your content is performing on Google searches.
2. Improve your SEO Strategies
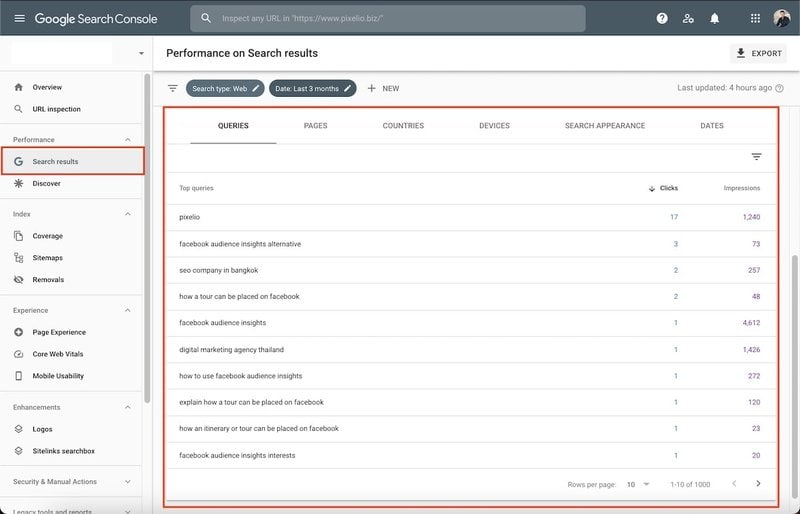
The search results performance metrics inside Google Search Console provides insights on your content’s performance.
You can analyze each web page/post to understand what posts are doing well in search for certain keywords.
Check out our complete guide on SEO keywords, keyword research and how to drive more traffic with keyword research.
With that data, you can focus on creating content that works for you. Moreover, you can work on improving the posts that are not performing well.
For example, your web pages have high CTR but low impression. Then this means your pages have attractive title and meta-description but isn’t appearing on searches that often.
3. Crawl and Index Your Website
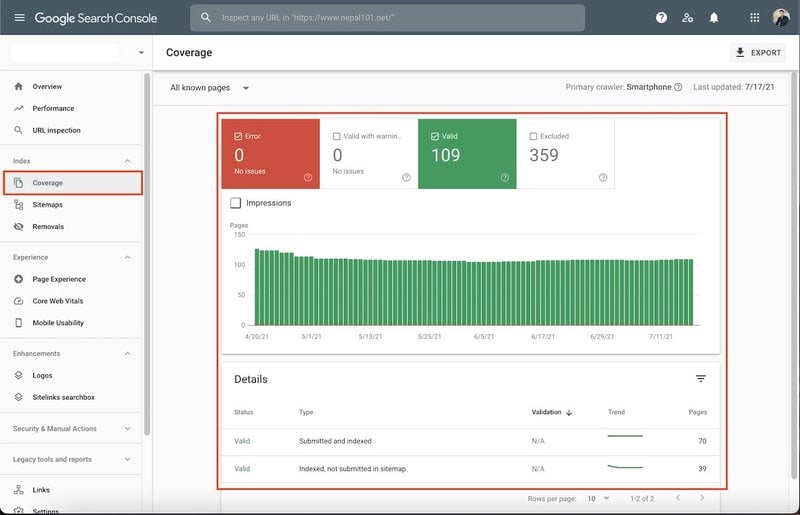
Crawling is the process in which search engine spiders (bots) go through content they find on your website. Whereas indexing means recording and storing scanned data so as to display for relevant searches.
Now, connecting your site with Google Search Console lets Google know of your website’s existence. So, it invites Google to crawl and index your website.
4. Submit Sitemaps
A sitemap is the blueprint of your website. It contains the list of all your directories, pages, and posts on your site.
And, Google Search Console lets you submit your website’s sitemap to it. With that, your website data are crawled and indexed better without a single page missed.
Moreover, it generated sitemap reports notifying you on the frequency of crawling, crawling & indexing issues, and possible solutions.
Besides, you get access to more helpful insights like link status, indexing reports & issues, mobile compatibility, etc.
Now that you know the reasons to have Google Search Console, let’s see how to set it up.
Setting Up Google Search Console Account for a WordPress website
Setting up Google Search Console just has some simple steps involved. Just follow them step-by-step without missing a step.
Let’s begin!
Step 1: Sign in to Google Search Console
To Sign in to Google Search Console, you need to have a Google account.
Quickly create your Google Account if you don’t already have one. It’s easy!
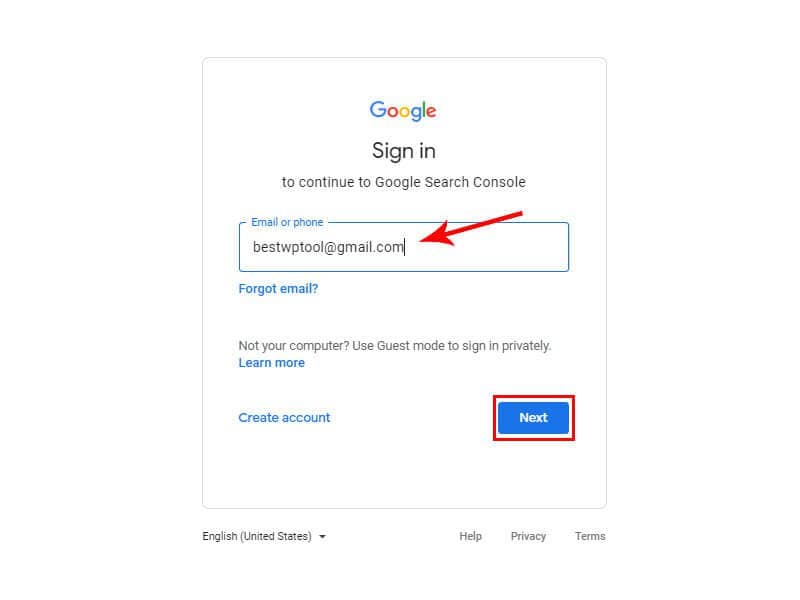
So, the first thing you need to do is go to Google Search Console and sign in with your Google account.
Step 2: Enter Your Website’s Domain (or URL-Prefix)
After signing in, it asks you to add a property, meaning you’ll have to enter what you want to connect Google Search Console with. Since it’s for your website, enter your website details.
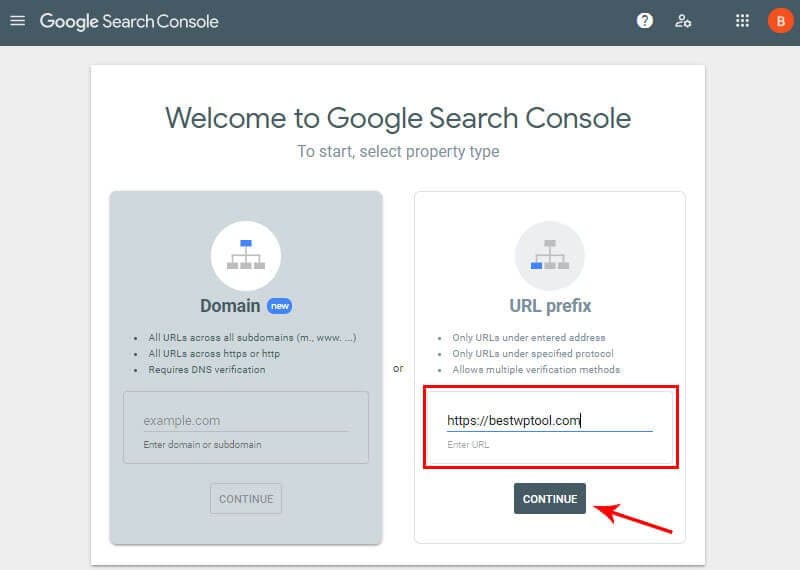
It offers 2 ways to add your property –
- By Domain
- By URL Prefix
1. By Domain – It lets you enter your website domain as a property. Example: marketingwithwp.com. However, it requires DNS verification which can be overwhelming. So, we’ll try the next method.
2. By URL Prefix – You can enter the website URL that you want to get listed in Google Search Console. Example: https://gold-hummingbird-729576.hostingersite.com. Verifying with URL prefix is a lot simpler as compared.
So, enter your website URL under the URL Prefix section. Then, click on the Continue button.
Next, it’ll ask you to verify the ownership of your website on the next screen.

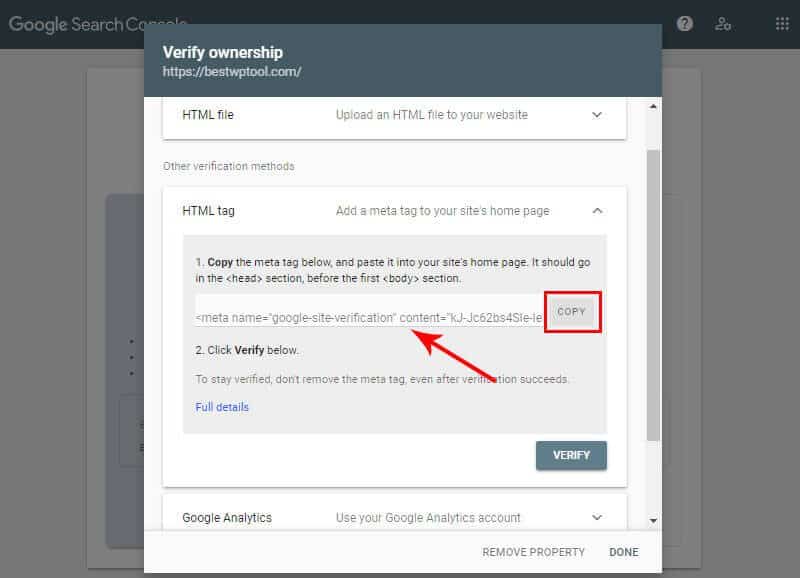
It lets you verify by various methods and you can choose any of them. However, an easier way is with the HTML tag method. Let’s proceed with it.
If you click on it, you’ll see a code. Be careful! Don’t click on the Verify button yet.
First, you’ll need the code to later copy on your website source code file.

Step 3: Install a WordPress Plugin to insert HTML code
When you access your website source code, you might mess it up if you don’t know what you’re doing.
So, we recommend using a plugin to insert the code. Here we’re using the plugin named ‘Insert Headers and Footers’.
So, leave the tab as it is, and open a new tab.
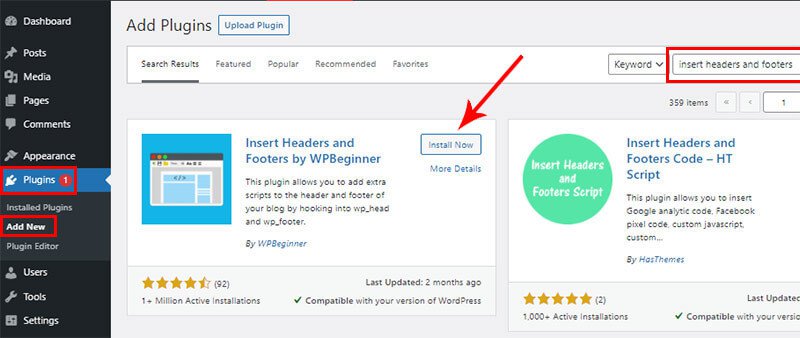
There, log in to your WordPress dashboard in a new tab. Then, go to
Plugins > Add New
After that, search and install the plugin – ‘Insert Headers and Footers’.
Step 4: Copy and Paste the HTML Tag code
Next, go back to the Search Console tab and copy the meta tag code.
Now, go to the WordPress dashboard again. Then, go to
Settings > Insert Headers and Footers
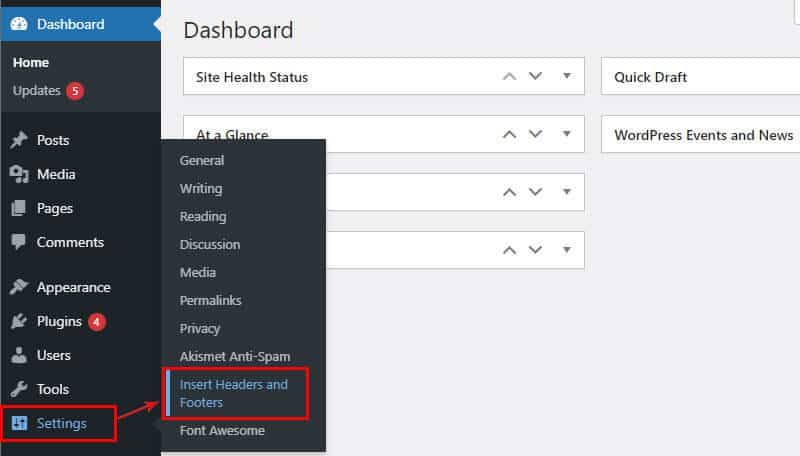
On the next page, you’ll see text boxes. Now, paste the code under ‘Scripts in Header’.

It would look like this.
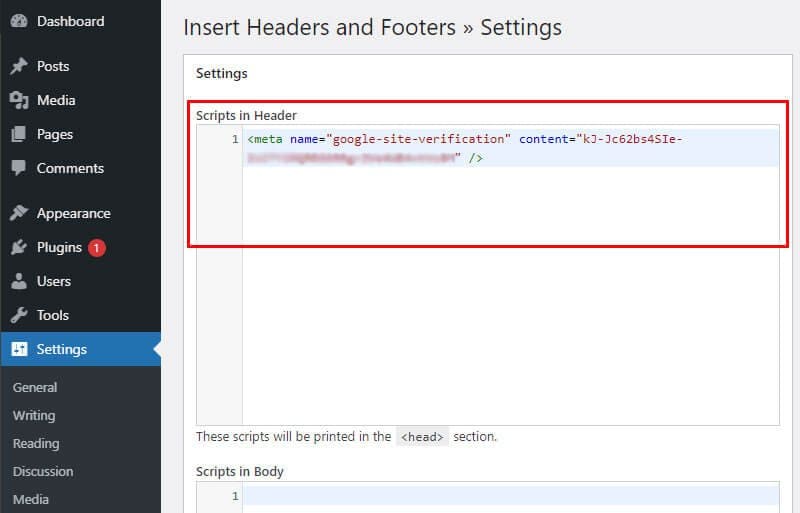
After that, scroll down below and click on the Save button.

Step 5: Verify Ownership of your website
Now the final step, go back to your Google Search Console tab and click on ‘Verify’.
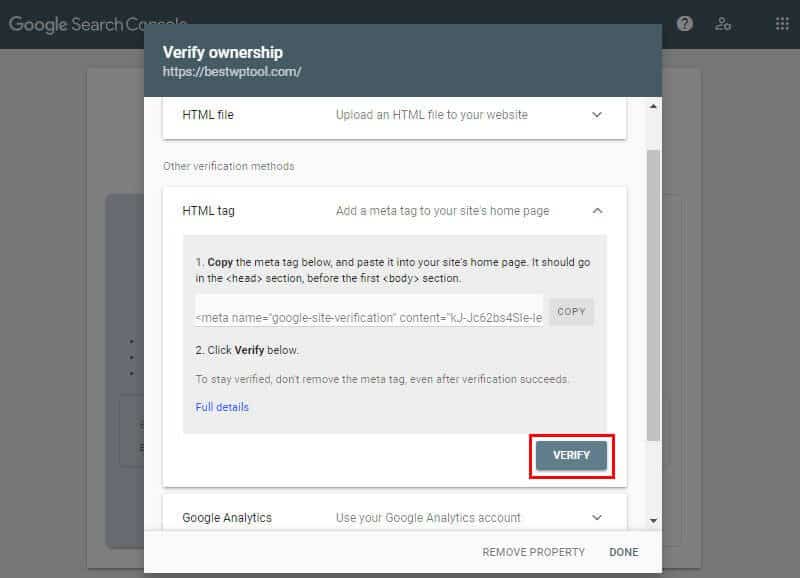
All done! It’ll display a success message after completing.

You’ll start seeing stats and reports on your Search Console dashboard once the traffic starts coming to your site.
How to submit your sitemap on Google Search Console
Setting up Google Search Console for your site can be helpful for lots of things. Among the important ones, it offers you to submit your website sitemap to Google as well.
Submitting your website sitemap is a way of informing Google of all the web pages on your website.
The process just involves 2 steps
- generating your website sitemap and
- copying its link to the Search Console.
Moreover, generating sitemaps is automatic with the help of SEO plugins like SEOPress.
So, here’s how you can submit your WordPress website sitemap on Google Search Console.
Step 1: Install SEOPress
Go to your WordPress dashboard then, and install SEOPress. SEOPress has both free and paid versions. And, you can choose and install either of them.
If you want help, then you can read our article on how to add a WordPress plugin.
After installing, you’ll see the SEOPress menu on the left sidebar. Hover over it to see its different sub-menus.
From there, click on XML/HTML Sitemap. Then, click on ‘View Your Sitemap’ on the next page.

Doing so, a new tab will open with the list of your web pages. They’re automatically generated by SEOPress.
Step 2: Copy your Sitemap URL to Google Search Console
Now, select the URL (link) you see after your domain.

You need to paste it on your Google Search Console account.
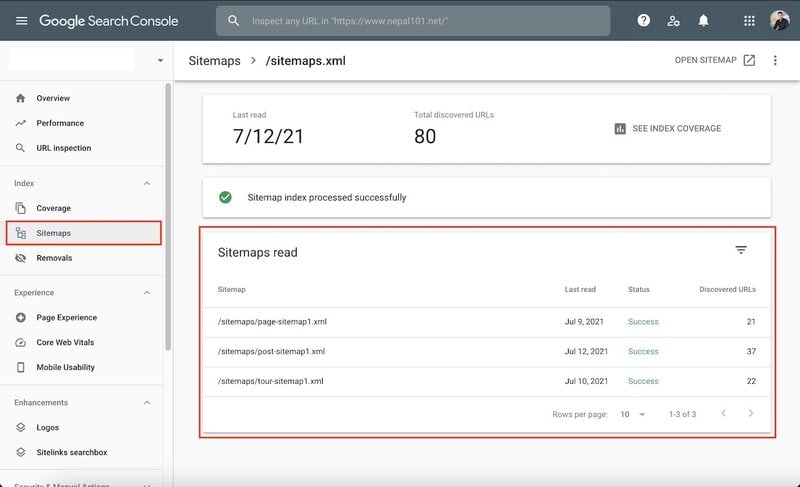
Now, go back to your Search Console tab, and then go to Sitemaps.

Then, paste it under the ‘Add a new sitemap’ text box and click on the Submit button.
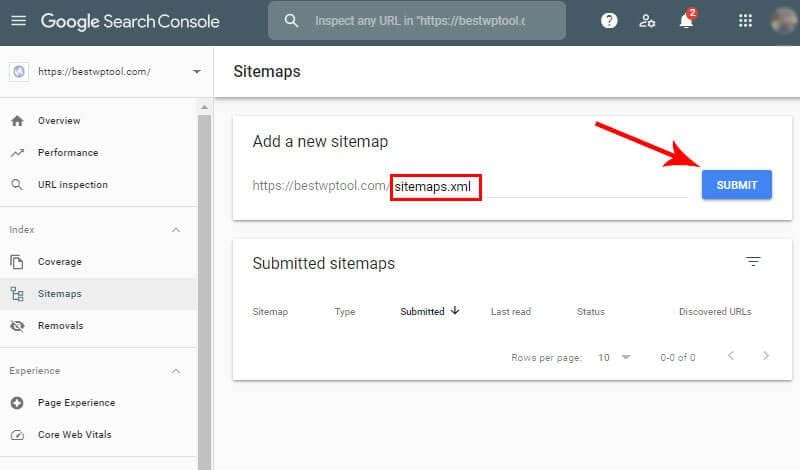
After a few seconds, it will display a success message like this.

It might take some time, even some days, to complete the request. Be sure to timely check it.
Conclusion
That is all you’ll have to do to set up Google Search Console in WordPress. The process is pretty easy and straightforward.
Next, we recommend you to connect your Google Analytics to the Google Search Console to synchronize all the data.
Moreover, if you are new to WordPress Websites, then we have comprehensive guide on important steps to install and setup in a new WordPress website.


