The tools and plugins recommend in the site are the ones we use, have tried or tested ourselves and recommend to our readers. Marketing With WP is supported by readers like yourself. If you take an action (such as a purchase) we might earn an affiliate revenue at no extra cost to you.
How to backup a WordPress Website?
One of the most important and overlooked tasks in managing a WordPress website is setting up an automatic and remote backup system. A WordPress website might crash or get errors due to updates or changes in the website. Setting up a backup system in your WordPress website helps you recover your website safely. Most importantly, it helps you secure your website and prevent the loss of important website data. In this post, we are going to show you how to backup your WordPress website.
A WordPress backup/migration plugin is required to backup and restore your WordPress website. There are free as well as premium backup plugin with varying functionalities that helps back up your website with just a few clicks. Moreover, you get options like backing up in your server, remote storage, local storage, and even timely automatic backups.
In this beginner-friendly guide, we will walk you through backing up your websites files & database with the help of a powerful backup plugin – WPvivid.
What is a Backup in WordPress?
A “backup” in WordPress is a complete copy of your website, stored typically in a remote, safe and secure location. It ensures you get back your website running in case any unwanted events occur.
A WordPress backup is comprised of 2 main components –
- Website files backup: It includes the backup of your core WordPress, themes, plugins, files, scripts, media files, etc.
- Database backup: Similarly, it includes the backup of the location of media files, blog posts, comments, settings, and options you’ve set on your website.
These 2 make up the backup of your whole WordPress website.
Why Backups are Important?
WordPress, as a CMS platform, is secure by itself.
However, with many moving parts, compatibility issue, plugin conflict and many other reasons, websites get errors. Many other factors, either intentional or accidental, can bring down your website. For example, your server might go down or, a plugin update might not work smoothly.
The backup feature offered by your hosting service can give you some peace of mind. But, you can’t fully rely on it. And, the best thing you can do is create a regular backup of your website by yourself.
In WordPress, a website relies on add-ons like themes and plugins to make it complete. Sometimes, the add-ons you use might conflict with your active WordPress environment. You may want to bring your site back to its previous state.
Or sometimes, you or your teammate might accidentally delete important pages or tweak settings while playing around. It’s impossible to get back if you don’t have a backup.
Similarly, cyber attacks like SQL injection, brute force attacks, are so harmful that they can even take down your whole website. Also, some developers intentionally make malicious themes and plugins to hack websites or steal important website data.
Now, getting your website back as it was before is only possible if you have kept the backup. With the backup, all you need to do is re-install the most recent backup and get your website back within few minutes.
How to Backup your WordPress Website
As we already said, creating a backup in WordPress is easy with the help of plugins. You’ll find numerous of them.
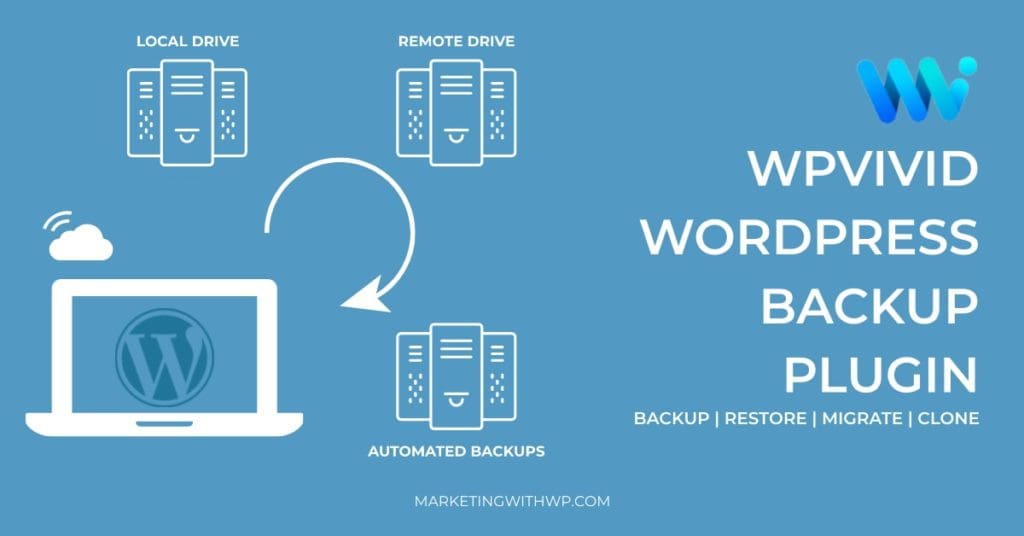
We use WPvivid in all our sites and it is one of the easiest plugins to create backups.
With WPvivid, creating your full site backup and restoration is easy. You have the option to save the files in remote or cloud storage, manually or automatically. The best part – all these basic features are available in the free version.
Also, you can go for the reasonably priced premium option for more advanced features like incremental backup, encryption, creating a staging site, dedicated support, and so on.
Let us get started with creating a backup of your WordPress website.
Step 1) Install WPvivid from WordPress dashboard
To install the WPvivid plugin, login to your WordPress website dashboard and go to
Plugins > Add New
After that, search ‘WPvivid’ on the search bar. Then, install the plugin that appears on the top.

After it’s installed, click on the Activate button you see right after installing.
If you’re confused, you can look at our detailed guide on installing a WordPress plugin.
Step 2) Backup your website
Option 1 – Backup Locally
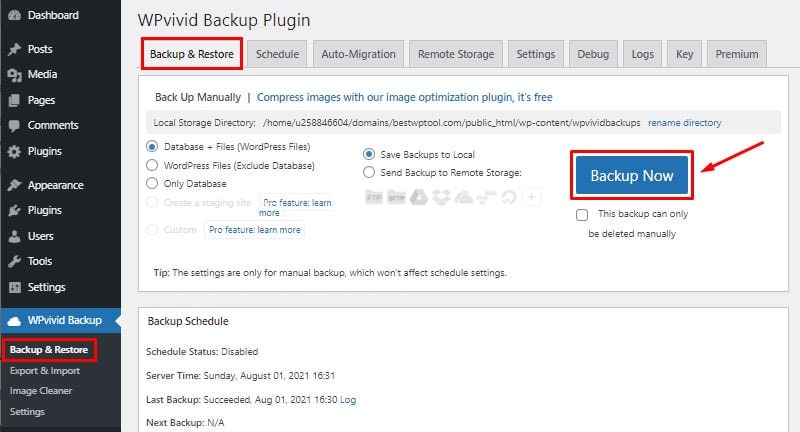
After complete installation, it’ll redirect you to the ‘WPvivid Backup’ menu on the left sidebar at the dashboard.
You can backup your whole website right away from under the Backup & Restore tab. You also get to select
– What to backup – website files, database, or both.
– Where to backup – local storage or remote storage.
By default, it will have options selected for saving both database and files in the local storage directory. Now, all you have to do is click the Backup Now button you see there. Doing so, it’ll save the copy of your website files and database on your hosting server.
It could take some seconds up to a few minutes depending on the size of your website.
Option 2 – Authenticate Remote Storage Location and Create Backup
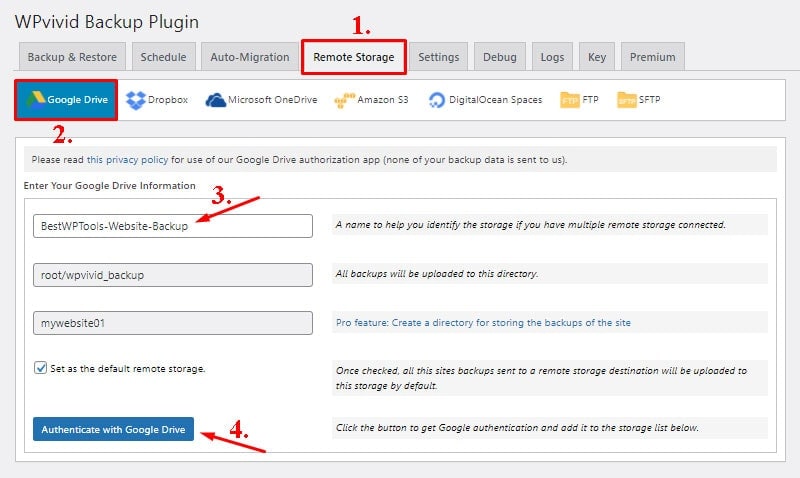
You can’t save a backup in your remote storage yet. You need to authenticate your storage location first.
For that, go to Remote Storage you see on the same page. There you’ll have a lot of remote storage options like Google Drive, Dropbox, OneDrive, FTP, etc.
For now, let’s authenticate with Google Drive.
So, select Google Drive and write a unique folder name where your backup will be saved on Drive. After that, click on Authenticate with Google Drive.
Next, it will redirect to a new page where you’ll have to select your account to save your backup.

Next, it’ll ask you if you trust WPvivid and allow access to use Google Drive for backup. Just check on the tick-box and click on Continue below.
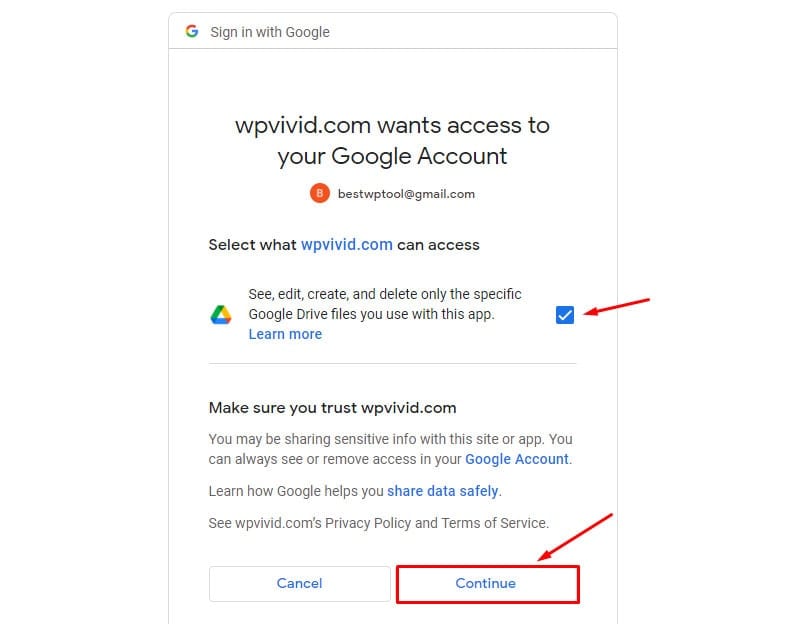
All done! You’ll have WPvivid connected to your Google Drive account for backup.
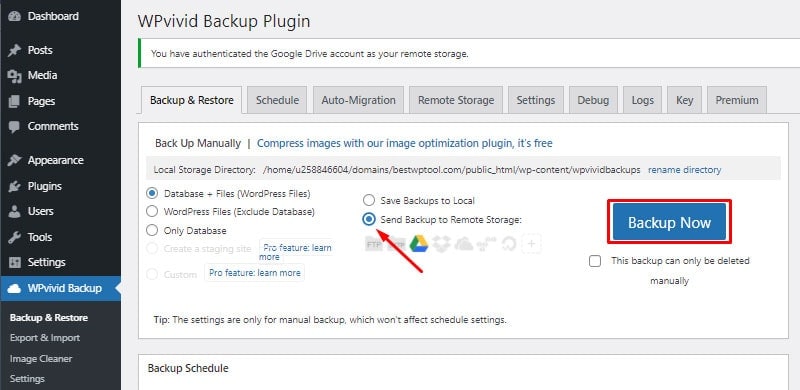
Now, it’ll take you to your website’s login page automatically. So, log in to your website again with your login credentials. You’ll see a notice informing the successful authentication of Google Drive as remote storage under the WPvivid Backup menu.
Now, you can backup in Google Drive by clicking on ‘Send Backup to Remote Storage’.
After that, click on the Backup Now button.
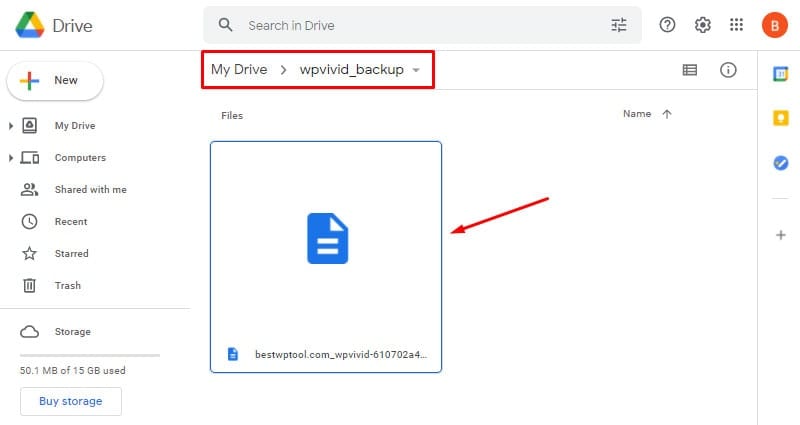
Again, it’ll take a while. After done, it’ll notify you with a success message. You can even check your Google Drive for confirmation.
Step 3) Download Backups to Your Local PC
To be more secure, you can download your backup file on your PC. For that, go to
WPvivid > Backup and Restore.
Then, scroll below to see the details of your previous backups. You can see the download option on the right of the backup. Just click on it to proceed to download.

Next, click on Download.

Doing so, it’ll start downloading the backup from the saved location, in this case, the local directory, to your PC’s directory.
How to Restore your Website’s Backup?
Now, let’s see how you can restore your website with backup.
On the Backup & Restore menu, scroll down below where you’ll see the details of all the backups. From there, just click on Restore you see next to the backup.
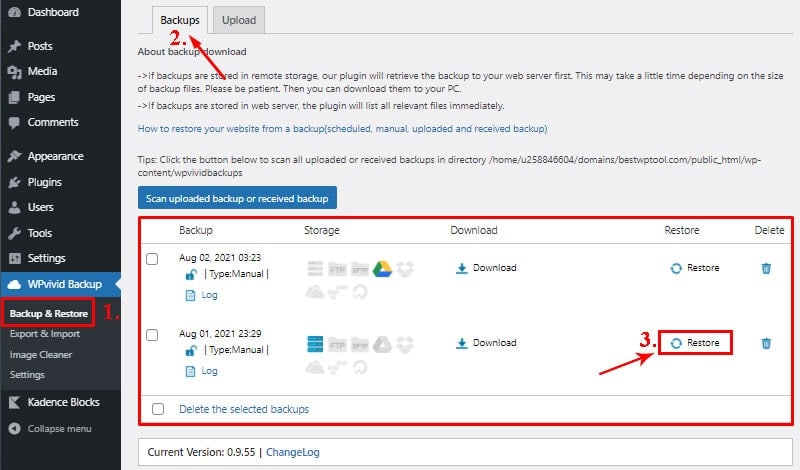
In the next window, just click on the Restore button to confirm it.
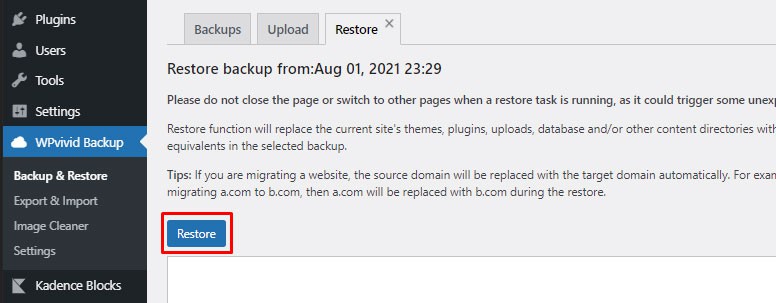
That’s all. Your site will be restored in a few seconds.
How to Schedule Automatic Backups?
WPvivid lets you schedule your backup process automatically. So, you don’t have to do it every now and then.
To set a backup schedule, go to ‘Backup & Restore’ under the WPvivid Backup menu. From there, click on the Schedule tab to see the schedule settings.

From there, click on the Enable backup schedule first. After that, just choose the time interval, backup data, and the backup location.
Here, we’ve configured a backup schedule for saving all WordPress files (Database + Files) on the web hosting server at the interval of a week.
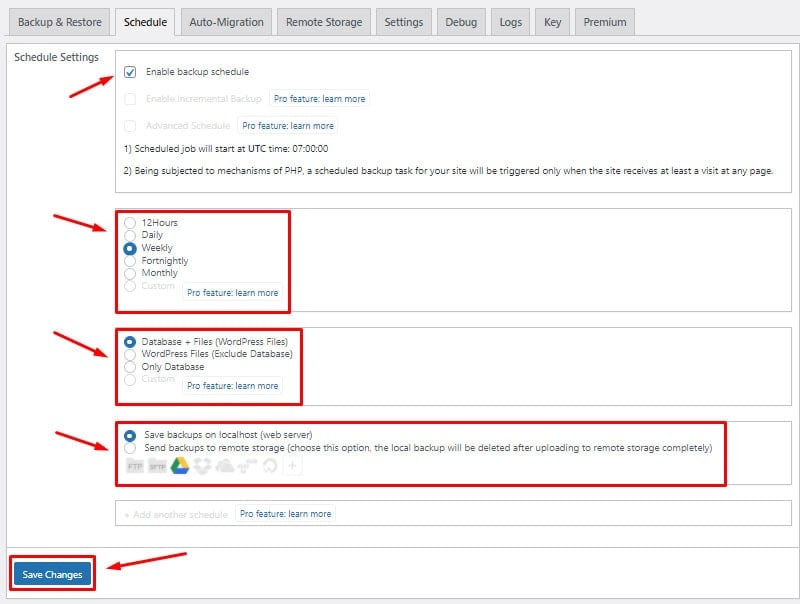
You can select these parameters according to your preferences. After that’s done, click on the ‘Save Changes’ button below.
Conclusion
Phew – hope you’re feeling much better now since you have backups of your website.
Best thing is – you now know how to create a backup of your WordPress website in the local web server and remote cloud storage. Moreover, you are now able to download the backup files to your PC and also schedule automated backups.
At Marketing With WP, we are always working on helping website owners to bring the best out of their website and turn their site into a 24 hour marketing machine.
If you’re new to WordPress, we recommend reading our detailed guide on essential things to set up in your WordPress website.
Or you can also check out our detailed guide on how to add a contact form to your WordPress website to make it easy for your clients to get a hold of you.


