The tools and plugins recommend in the site are the ones we use, have tried or tested ourselves and recommend to our readers. Marketing With WP is supported by readers like yourself. If you take an action (such as a purchase) we might earn an affiliate revenue at no extra cost to you.
How to Add Tags to WordPress Posts?

In this doc, we will go through Tags in WordPress – adding, editing, and deleting Tags.
WordPress offers another default feature to group posts with Tags. Tags is a simple feature to organize content within the WordPress CMS.
The tag is similar to WordPress categories in the sense that they both are the default WordPress taxonomies and help to group related content. However, tags are more specific and optional in comparison to categories.
Also, creating tags is pretty similar to creating categories as well.
Find out how to create tags below –
Go to Posts > Tags
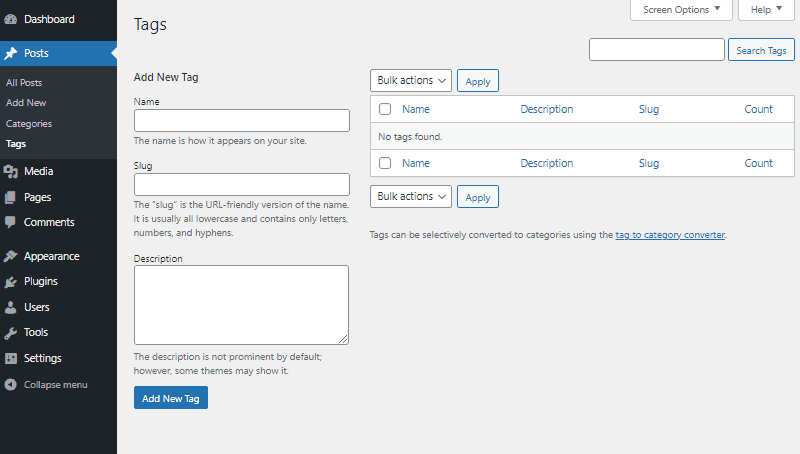
First, go to your admin dashboard, and then go to Posts > Tags.

Next, you’ll reach the page for creating the tags. On the same page, you’ll also see the lists of tags you create. For websites having a large list of tags, there’s a search feature to find tags with ease.

Fill Information for the Tag
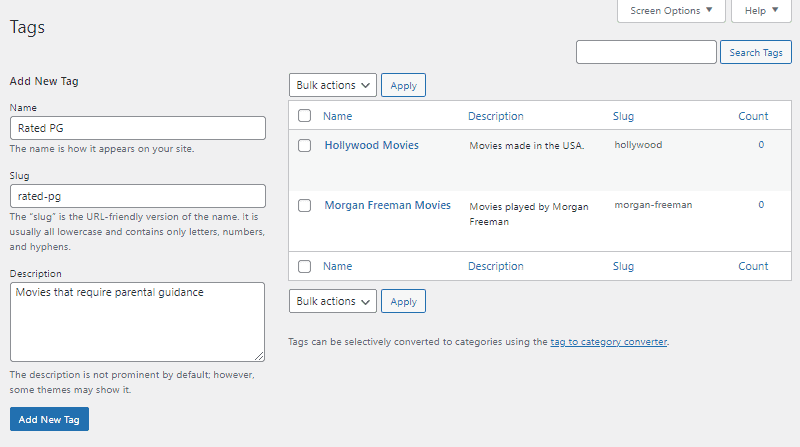
On the left side, you can see the heading ‘Add New Tag’ with some text fields below. To add a tag, you’ll have to enter the following information.
Name – It has the text field to enter the name of the tag.
Slug – Here, you should enter the URL slug of the tag.
Description – You can enter the description of the tag you are creating. Entering the description is optional, unlike the name and slug.
Save the Tag
After you have entered the tag information, click on Add New Tag button. Then, the tag will be added and ready to use.

The tags you’ve added will appear on the right side of the page.
Add Tags to Blog Posts
Now, let’s see how you can add tags to WordPress blog posts.
You can add tags to posts from the WordPress Gutenberg post editor, either you are creating a new post or editing an existing one. Also, you can add tags to existing posts with the Quick Edit feature of WordPress. Let’s see them both.
1. Add Tags using Post Editor
You can add tags to posts while you are adding or editing them.
For now, let us say you want to add tags to an existing post.
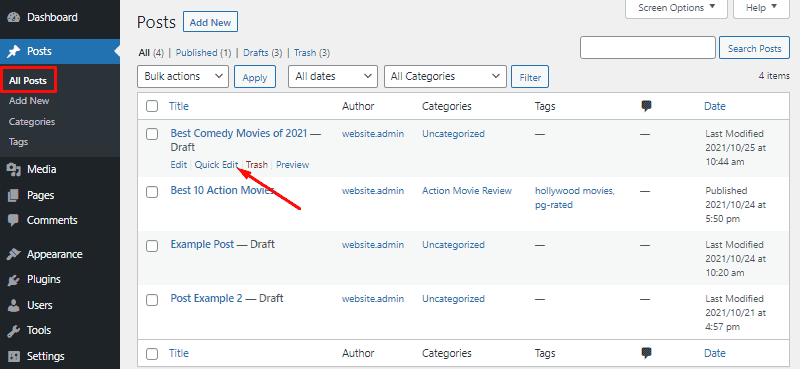
Go to Posts > All Posts to see all the available posts.
From there, hover over the post and click on edit below it.

This will open the Gutenberg post editor with the post content. On the right sidebar under ‘Post’, you can see the option labeled ‘Tags’.

Click on it, a text box will show up where you can enter tags. You can even enter new tags that do not exist on your website.

After that, click on Save Draft or Publish to save it.
2. Add Tags using Quick Edit Option
Next, let’s see how to add tags easily and quickly to existing posts with the Quick Edit feature of WordPress.
Go to Posts > All Posts and hover over the post you want to add tags to. After that, click on the Quick Edit option below it.

This will open the quick edit window with a few basic editable options. You can see the text box to add tags. Just type in the tags suitable for the post, and be sure to separate them by commas.

Also, click on Update after adding the tags to save it.


