The tools and plugins recommend in the site are the ones we use, have tried or tested ourselves and recommend to our readers. Marketing With WP is supported by readers like yourself. If you take an action (such as a purchase) we might earn an affiliate revenue at no extra cost to you.
How to add Widgets in WordPress Website?

Widgets are a block of content that you can add to specific areas on your website like footers, sidebars, etc. The widgets help your website, visitors, with quick and easy navigation and access to various important features, functions, links, etc on your site.
This post will cover how to add widgets to a WordPress website.
Step 1) Go to Widgets from Dashboard
First, go to Appearance > Widgets from the website dashboard.
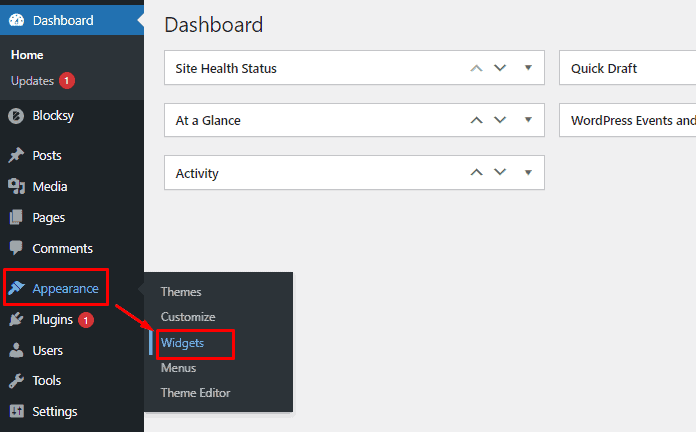
Then, you will reach the interface to edit and add widgets.

As you can see, there are 8 widget areas here – 1 for the sidebar, 6 for footers, and 1 as inactive widgets. Depending on the theme you use, you get different widget areas.
Step 2) Select a Widget Area
Now, let’s select a widget area and edit it depending on how you want it to look.
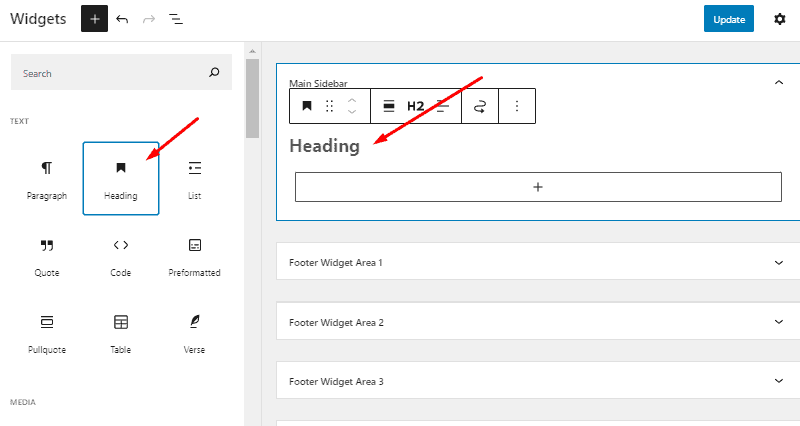
For now, we are going to edit the widget area ‘Main Sidebar’. For that, click on the dropdown arrow next to it open the widget area.

It already has some widgets added to it. You can edit the existing widgets or add some other widgets and edit them.
For now, we are quickly going to remove all the widgets there so that we can add new ones from scratch.
Step 3) Add Widgets
Adding widgets is similar to adding blocks on the Gutenberg post and page editor.
At first, click on the plus (+) button to see the available blocks to add. You can either search for the blocks or browse. You can see the full list of blocks to add if you click on the blue plus (+) button at the top-left side of the interface.

Now, select from the available blocks to go on the sidebar widget area.
You can add different content like heading, paragraphs, pictures, quotes, tables, buttons, shortcodes, social icons, search boxes, etc.
Step 4) Edit the Added Widget
After you have added widgets to the widget area, edit them accordingly.
For demonstration, here we selected the heading block, typed in a heading title, and performed some edits like H2 heading level, bold, italic, etc.

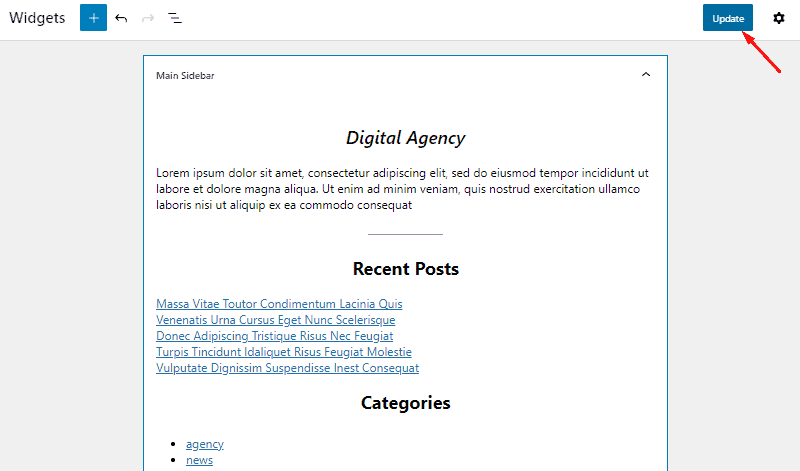
Similarly, we added some more blocks, edited them accordingly.
Step 5) Click on ‘Update’
After you have customized the sidebar widgets as you want, click on ‘Update’ at the top to save it.
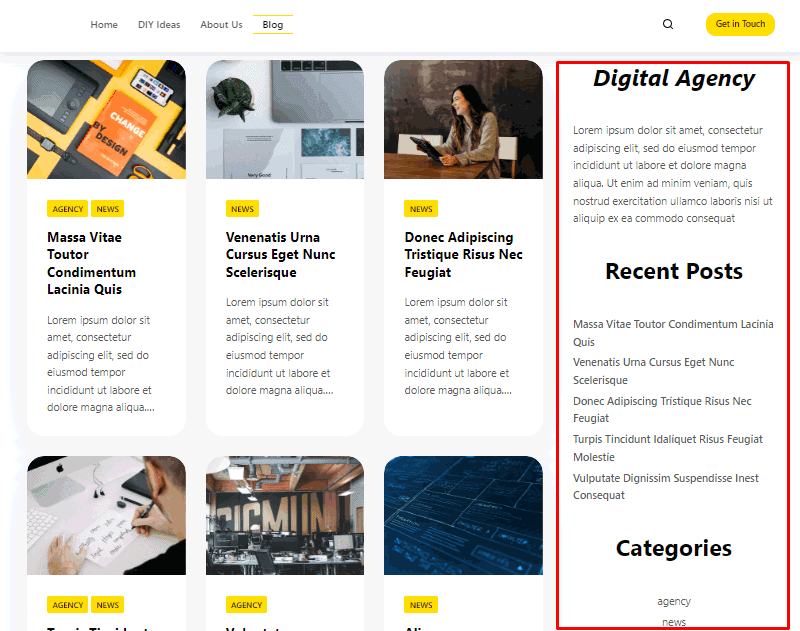
Now, let’s see how it looks on the website.


WordPress Comments Overview – Access and Mange Comments