The tools and plugins recommend in the site are the ones we use, have tried or tested ourselves and recommend to our readers. Marketing With WP is supported by readers like yourself. If you take an action (such as a purchase) we might earn an affiliate revenue at no extra cost to you.
How to setup WordPress Privacy Settings?


WordPress recommends having a privacy policy page for any kind of website. It’s the page that describes how the website will collect, reserve, preserve, and use the users’ personal information.
In WordPress, you can create your own privacy policy page manually and use it. However, starting from complete scratch especially if you don’t know what to include can get daunting.
Worry not – WordPress lets you create a privacy policy with a pre-made template from the dashboard.
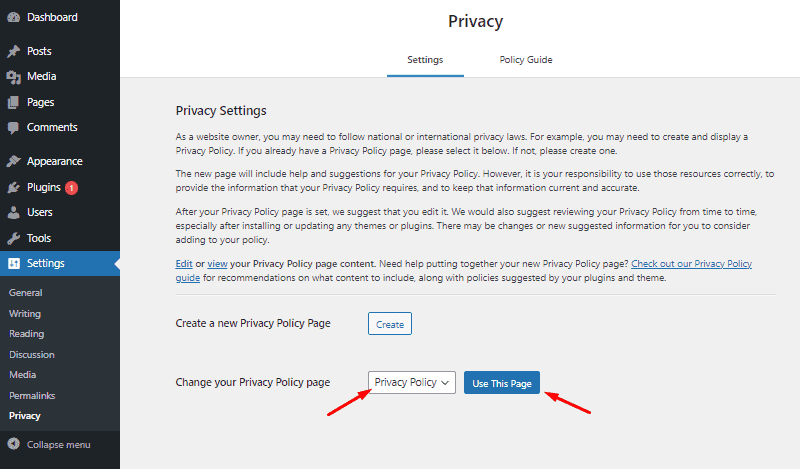
Go to Settings > Privacy from the dashboard
On the next page, it will display a notification to create or select a privacy policy page if you haven’t created or selected one before.
Now, you should click on the Create button to let WordPress generate a new Privacy Policy page for your website.

Doing so will direct you to the WordPress page editor with the content generated by WordPress.
On top of it, you’ll see the recommendation to check what the page consists of.
Anyway, the generated page is a template with standard information. You can go through the text and make edits & tweaks depending on how you plan to conduct and run your website. You can include your own clauses and terms as well.
After going through it, click on the Publish button.

/image – wordpress editor with the privacy page
Now, go to the Privacy Settings page again, select the Privacy Policy page from the dropdown menu and click on Use This Page.
Remember that the Privacy Policy Page will be automatically added to your header menu as well. Most websites don’t prefer the privacy policy page at the top of the page. If you want, you can remove it from the menu. We’ll see it later while learning about creating and editing menus in WordPress.


WordPress Comments Overview – Access and Mange Comments