Marketing With WP
Tutorials to make your website a 24 hr marketing machine
Marketing With WP
Tutorials to make your website a 24 hr marketing machine
Thinkific Review
If you are looking for a user-friendly solution for creating and selling online courses, then Thinkific is one of the best to do it.
The platform, Thinkific is an online hub for digital entrepreneurs and creators to sell their knowledge & expertise through online courses. It provides a simple and straightforward dashboard to create and launch advanced learning material without being technical.
Besides, with Thinkific, you will be able to provide a good experience to your students with cohort-based learning, unlimited lessons, quizzes, assignments, customized page & course player designs, etc.
So, is Thinkfic the best platform for your need? Let’s find out from this review post.
Here, we will give you an idea of what Thinkific is, what is it best for, how to get started with it, its pros, cons, alternatives, and more.
So, let’s dive in!
Thinkific Overview
Thinkific is a popular SaaS platform that provides an efficient way for online entrepreneurs, creators, and teachers to create online courses and make passive income off of them. Over 50,000 courses creators have chosen Thinkific and running their online course business successfully.
In fact, you can create unlimited courses with different types of content including videos, audios, downloadable files, text, etc. as your courses need. Plus, adding quizzes, assignments, discussion forums, question banks, live sessions, exams, etc. is possible on Thinkific to make teaching and learning more interactive on your online school.

Not only that, but Thinkific also offers the tools to create a brandable website with attractive landing pages to capture your customers’ attention. With the customizable templates and drag-and-drop sections, creating different types of pages is possible for your Thinkific website.
Moreover, the email marketing integration, coupons, offers, tracking, SEO, affiliates, and other marketing features make customer acquisition easy.
A great thing about Thinkific – it is focused on making your students’ learning experience better. This desirable quality of Thinkific is backed up by the features like easy navigation, instant resume (resume courses on any device), multiple languages, and user communities.
Who is Thinkific best for?
Thinkific is best suited for online business owners, professionals, online creators, and teachers who focus on providing qualitative courses for a better user experience.
It doesn’t matter what niche you are in. If you want an easy solution for setting up a whole online school along with providing a seamless user experience, then Thinkfic is the platform for you.
Also, Thinkific is also a great option if you are on a budget. You can use Thinkific’s free plan to launch a single course with multiple video lectures and other file types.
The free plan obviously limits you from using some of its advanced features. But, you can still make a good income out of it. In addition, the free plan of Thinkific doesn’t charge any transaction fee for the sales you make.
Other useful features of Thinkific that make it one of a kind are – integration with lots of tools, email white labeling, powerful course builder, cohort-based learning, certifications, engaged learning, and much more.
Thinkific Features
Now, let’s look at the standout features of Thinkific.
Free Plan
One of the reasons creators love Thinkific is for its forever-free plan. It provides you with all the basic features you need to create a course and earn well by selling it. You will get full access to create payment plans and receive payments from the students.
The best part of using Thinkific free is that there is no transaction fee associated. This means you don’t have to give away any portion of your income to Thinkific. This makes it better than its close competitor Teachable. ($1 + 10% transaction fee).
Note that, the free plan can only host your single course per account. Anyway, you get tons of other features like full content & video hosting, drag-and-drop course builder, content importing, quizzes, tracking, e-Commerce, templates, etc.
One important mention, Thinkific offers email and phone support even on the free plan. You will rarely see such granting free plan on other tools.
Quizzes, Student Progress Tracking, and Student surveys
Along with creating courses with video, audio, and texts, Thinkific lets you assess your students with quizzes, surveys, and tracking the outcomes.
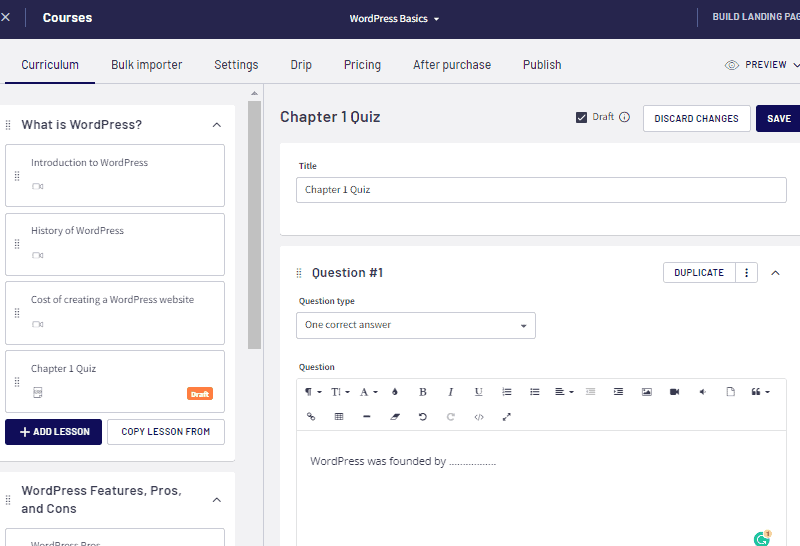
Creating advanced quizzes is possible right from its course-building interface. Just select quiz as the lesson type, add questions and provide multiple choices for answers.
The question and its choices can be built with the WYSIWYG (What You See Is What You Get) editor for formatting them as needed. In addition, you can also add explanations for the answers.
Similarly, you can add surveys at the start of your course for finding more student details, their reason for joining your course, what they are expecting to learn, their expertise, etc. Also, it can be added at the end for knowing what they learned, how easy the course was, and collect their feedback.
You can create surveys with multiple questions – both optional or required. And, the students can give answers with free text, one answer, multiple answers, rating, scale, etc.

Now, you can track and review the results of both quizzes and surveys. The students’ results from the quiz can help you determine who learned well and who needs extra attention. Similarly, reviewing the surveys can be helpful for you to know your students better and improve your courses as well.
Great focus on students’ experience
Thinkific has special attention to the experience of your students. It helps you with letting your students focus on learning with smooth sign-in and hassle-free access to courses. This results in maximum course completion rates, meaning your students learn more.
Also, the students can check out the purchase and start learning in just 2 simple steps – i. Sign up for the student account & ii. Enter payment details and confirm the purchase.
Also after the sign-up, the students will have their dashboards listed with the courses they are enrolled in. It’s easy to navigate around the dashboard and within the courses.
The course resumes from where the students have left off after playing. It doesn’t matter what device you are you are watching the course videos. If you are logged in, the videos will play from where the students last paused.
Along with that, adding assignments, quizzes, discussion groups, question banks, live sessions, exams, etc. make the learning more interactive and engaging.
Moreover, you can offer the site in different languages according to your students’ preferences. Similarly, you can improve the students’ experience by providing a discussion forum that you can easily create on Thinkific.
Advanced course creation
Thinkific lets you create advanced courses with no technical or design knowledge. So, even beginners can easily create and upload courses with the Thinkific course builder.
Firstly, it offers different types of course templates to get you started. The courses are made up of chapters and lessons which can be added multiple times.
Adding a different type of content i.e. video, audio, PDF, text, downloadable files, HTML, presentation slides, etc. along with content with third-party tools like Typeform, Google Docs, etc. is also possible. In addition, you can also edit the course content with proper title, descriptions, and thumbnail images.
Talking of videos, it supports unlimited video hosting with in-house fast and reliable Thinkific hosting. So, you require no external video hosting service.
Also, if you have existing content, then you can easily import them into the intuitive drag-and-drop course builder. Along with that, you can easily add presentations, quizzes, surveys, etc. directly from the content creation tools.
To increase engagements, you can create a discussion group with built-in tools, Disqus, or third-party discussion tools. Also, student survey features can let your students rate your courses that work as social proof for other potential students.
Teaching Tools
Thinkific has powerful teaching tools to create different models of learning. Some are –
- Self-directed learning – The study that requires no involvement or guidance from the teachers
- Cohort study – It creates a virtual environment for the students sharing a common subject join classes together.
- Hybrid learning – It’s the model where you can conduct both online and on-site classes with schedules. It’s useful for schools, colleges, and offline teaching institutions.
Now, Thinkific also offers to track students’ quiz results, collect assignments, and survey students. Moreover, you can track course completion rates for individuals and groups. So, it helps you decide who needs more attention and guidance.
If you are really going to scale your course business, then you can have multiple admins, authors, and instructors for teaching and managing your online school.
In addition, you can award certificates to students on successful course completion. Also, a minimum passing grade can be set for awarding the students who achieve it.
Site customization and branding
As we mentioned, Thinkific lets you create a fully-fledged course site with multiple pages like a home page, sales pages, checkout page, thank you page, login page, and so on.

Also, you can create the whole website from complete scratch or choose from the available themes. Designing pages are made easy with drag-and-drop sections like headers, banner, buttons, product list, pricing table, countdown timers, FAQs, icons, etc.
Now, Thinkific also lets you choose your own custom domain name. And, it’s editable as well.
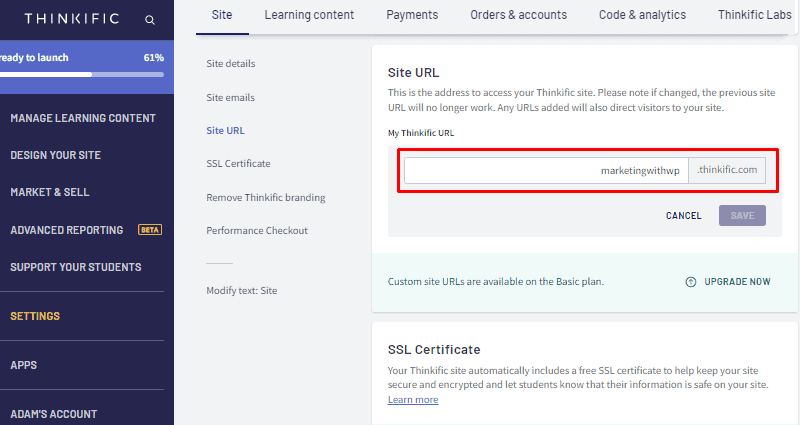
But, note that your domain will be the subdomain of the Thinkific site. For example –
firstyogaclasses.thinkific.com
Now, if you are on any of the paid plans, you can even remove the Thinkific branding from the URL with a custom domain. This means you can use your own domain to display your Thinkific site.
For example, you can have a custom domain like this –
firstyogaclass.com
Talking of branding, you can completely white label your online course platform so your customers don’t see the Thinkific branding. Also, you can add your brand identity with logos, banners, colors, etc.
Selling and marketing tools
Thinkific lets you create different payment systems – free, lifetime payment, and time-limited. This will help you offer courses with varied payment plans.
What’s more important is that Thinkific doesn’t hold your payment. The amount goes to your account immediately after the purchase is made.
It supports Stripe for safe checkout in over 130 currencies. If not supported, then you can also receive payments using PayPal.
Thinkific courses perform well on relevant searches on Google and other search engines with SEO-friendly URLs, meta tags, thumbnail images, etc.
For collecting email leads, you can offer a free trial to your courses as well. Talking of emails, there are some basic email marketing features that come with the integration with email marketing software like Aweber, Mailchimp, Mixpanel, etc.
In addition, you can improve your marketing and selling with Javascript tracking, Facebook Pixel tracking, Google Analytics, etc.
Moreover, Thinkific offers more features like upselling, affiliate marketing, coupons, offers, content dripping, etc. for customer acquisition and retention.
Support
Another important aspect of Thinkific that users love is its customer support. It has a friendly and knowledgeable support team who are ready to help you through email, chat, and onboarding calls.
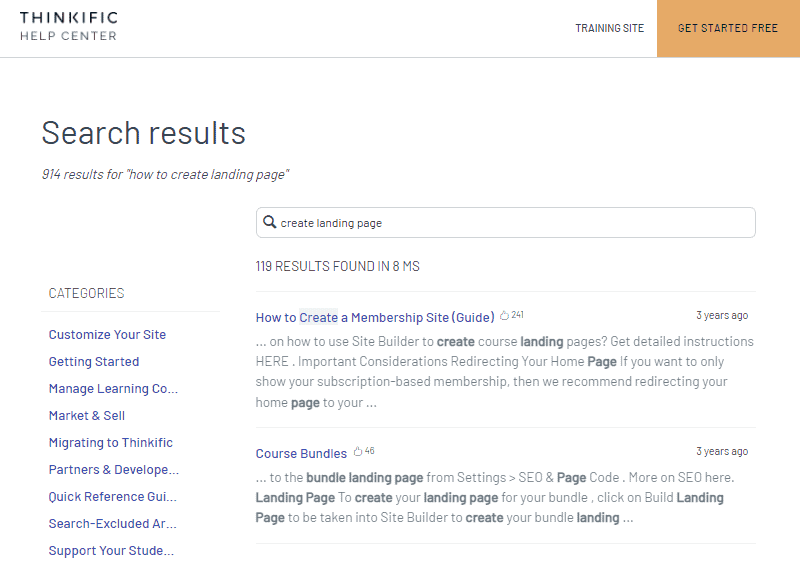
Also, it has a comprehensive knowledge base with a detailed guide, videos, and FAQs that answer your questions. You can easily search for a topic on the search box. And, it will come up with the relevant results available on the documentation.
Moreover, you can also join a private Facebook group to learn from instructors who have launched their own online course on Thinkific.
If you are on higher plans i.e. Premier and Plus, you get an onboarding call in which you get live call assistance from the support team. Also, when you are ready to launch, the Thinkific team could check in with you if you are ready to publish.
What’s even more interesting is that it offers email and phone support even if you are using the free plan.
How to create an online course with Thinkific?
If you have no previous experience in creating courses, getting started on creating courses might be a little confusing. But Thinkific makes it very easy for beginners.
We have found Thinkific to be easy to use and all the features are easily accessible from the dashboard within clicks.
Now, here we will get a free Thinkific plan and try out creating a basic online course.
Let’s start!
Sign up to Thinkific
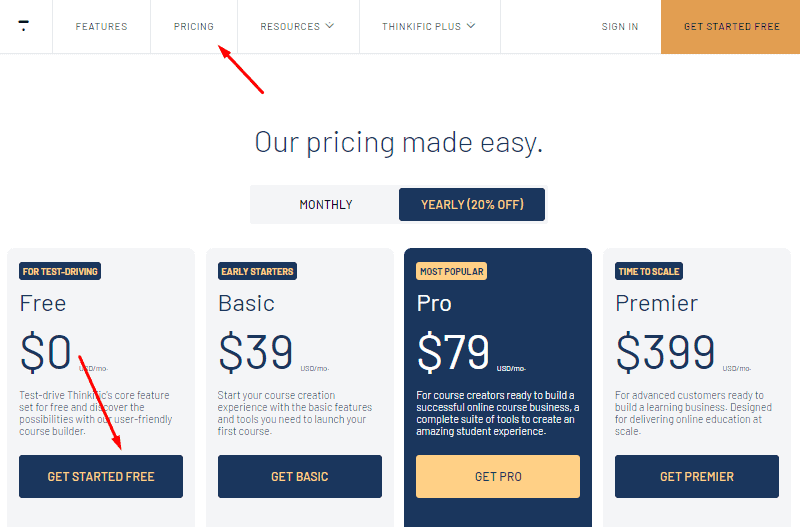
The very first step is to sign up for Thinkific and create an account. For that, go to the Thinkific website and click on the Get Started Free button.

Or, you can also go to the pricing page and choose the free plan from the available packages.
Next, enter your name, email address, create a strong password, and click on Create your account button.

This will create your account successfully.
Go through the onboarding process
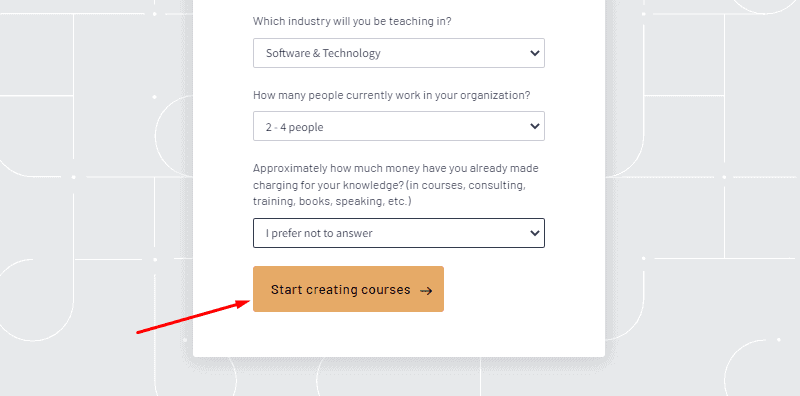
Next, it will take you through a series of steps for onboarding to the Thinkific backend. You just have to answer some survey questions by selecting the given options.
First, you have to mention if you are already teaching online or not. If you are teaching online, are you using other course platforms, or without any LMS platform?

Similarly, it will require some other answers like the size of your email list, if you have your content ready, your professional identity, related niche, team size, and income.

After entering all the details, click on the Start Creating Courses button to submit and continue.
This will take you to your Thinkfic admin dashboard. But, we recommend you verify your email address before continuing ahead.
Confirm your Account
If you check the email account, you will have received a mail from Thinkific for the email confirmation. It’s for validating that the email address truly belongs to you.
So, open the email and click on the Confirm my account button.
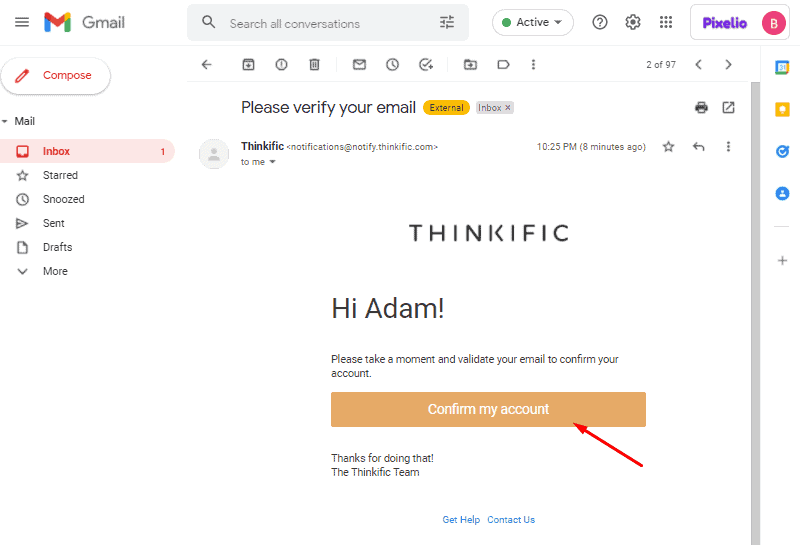
This will take you to your login page.
Login to Thinkific
Now, you can log in directly from the login page you reach after the email verification.
Or, you can go to your login page from Thinkific’s home page as well. Just click on Sign In from the header menu.

On the next page, enter your email username and password. Then, hit the Sign In button.

This will take you to your dashboard which looks like this.
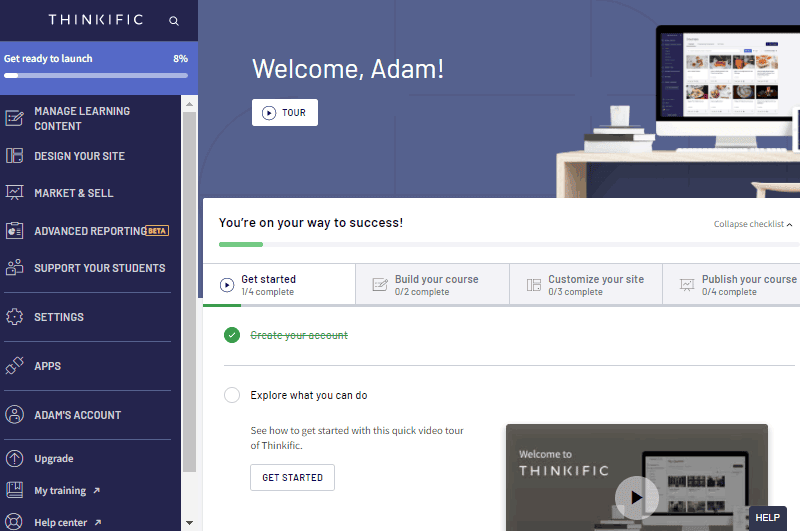
Create a Course
Once you are in the dashboard, you can start creating the course.
Now, let’s go step-by-step on creating a proper course with multiple chapters, lessons, and appropriate content.
So from the dashboard, click on Manage Learning Content and go to Courses.

By default, Thinkific has created a demo course for you. Now, all you have to do is click open and edit it.
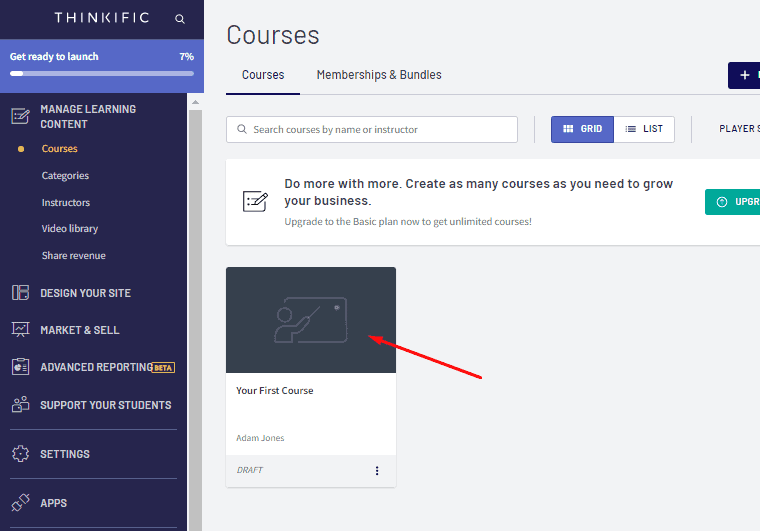
This will take you to the course builder of Thinkific. You will be at the Curriculum tab at default.

For this demonstration, we are going to create a beginners’ WordPress course ‘WordPress Basics’
Edit Course Name and other Details
Now, the first thing we recommend you do is to rename the course and edit other important details. For that, go to Settings from the top menu options on the course builder.
From there, you get to edit the course name and URL. After you have edited, save the changes with the Save button.

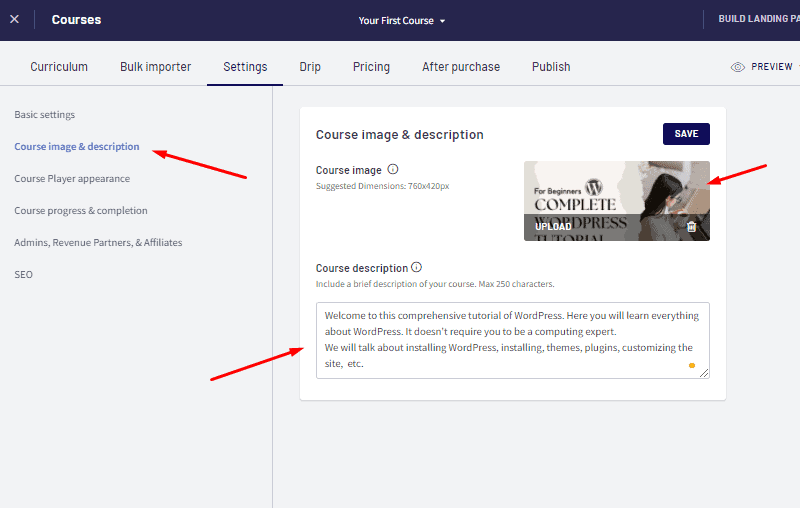
Now, you can also add course images and descriptions by clicking on Course Image and Description. And, don’t forget to save it.
Add Chapters
Back to the Curriculum tab, let’s add some chapters at first. For that, click on Add Chapters, give the chapter’s name, and then click on Save.

The chapters can be arranged as needed with the drag-and-drop tool. Just click and hold on the dots left to the chapters’ name and move it to the position you like it to be placed.

Add Lessons
Adding lessons is also similar. Just click on the + Add Lesson button you see below the chapters.

Next, it will show a list of types of content you can add to that lesson. For now, let’s add a video and write some text for each lesson.
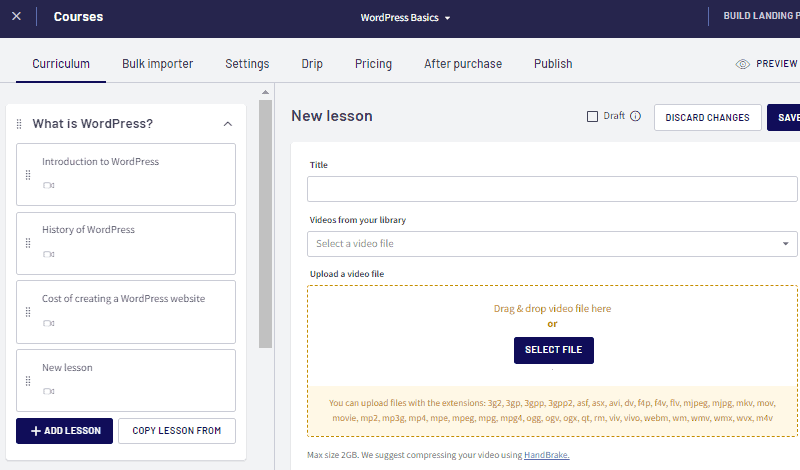
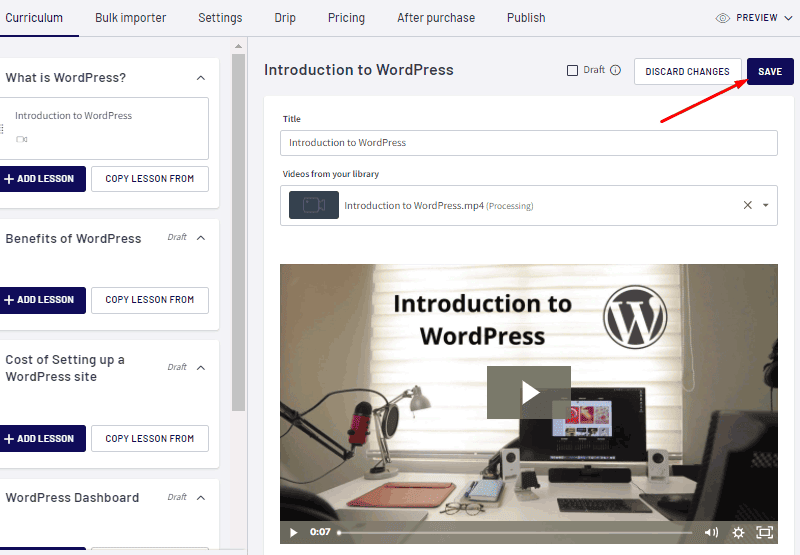
For adding the video, just click on Video from the list.

Now, add the video title, upload the video file manually or by dragging, add optional text & downloadable, etc.
Here is how to upload a video on Thinkific lessons with drag-and-drop.
Similarly, to add text, scroll down below, click on Add Text. This will open a text editor. Now, enter your text in the text area.
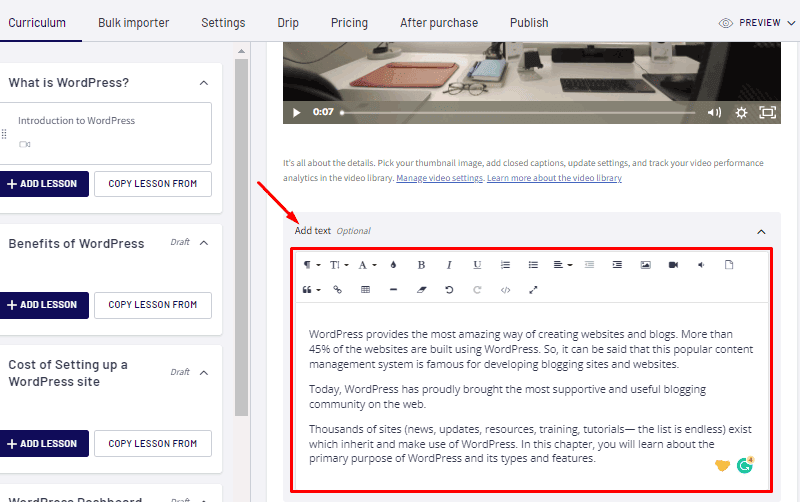
Finally, click on the Save button at the top of the page to save it.
Also, there’s the bulk importing feature for adding multiple contents once. For that, click on the Bulk Importer tab from the top.

After that, scroll down to which chapter you want to add the videos. Now, select the video files and drag-and-drop them on the upload box below the chapter it belongs to.
With that, the lessons will be created for each video with the same name. You can edit the lesson names if you want.
Configure Course Settings
Now, we will configure some of the settings for the course. So, go to the Settings tab from the top-most menu.
From there, you can see a bunch of options on the left-hand side. We have already gone through the first and second ones – Basic settings and Course image & description settings.
Now, if you go to Course Player Appearance, you can set up how the course player looks to your students.
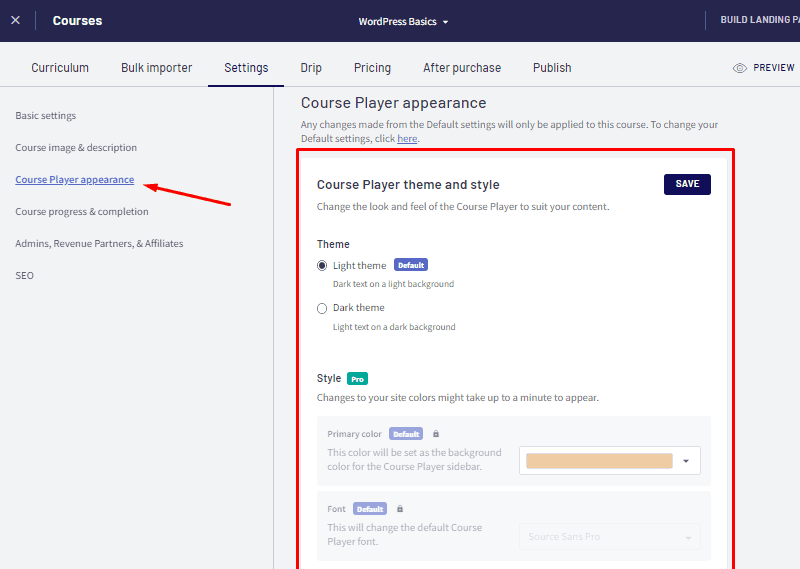
There you will have lots of options like choosing a light or dark theme, colors, fonts, lesson icons, course player logo. This makes it easier for you to match the course player with your brand. Note that these options are available on the paid plans.
Next, you can customize how your students complete your course on the Course progress and completion menu.
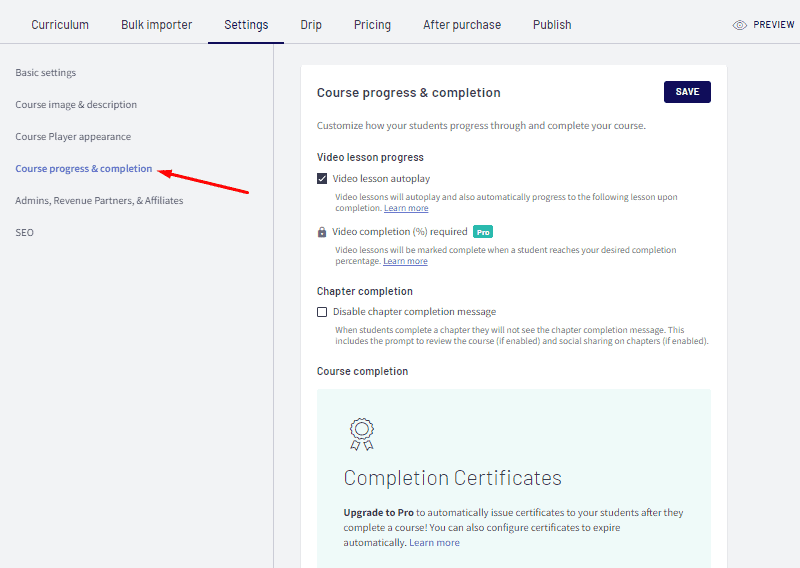
This section has free options like enable/disable video autoplay, enable/disable chapter completion message, display custom completion page to customers, social sharing of course & chapter completion, etc.
Similarly, the rest of the options like video completion % requirement, course completion certificate, etc. require upgrading to the premium plan.
Next up, you can check the Admins, Revenue Partners, and Affiliates menu. It consists of options for managing course admins, managing members for sharing the earned revenue, and managing the affiliates of your course. These are for the premium version only as well.
At last, there’s the SEO menu from where you can enter SEO title, meta description, and course keywords. These help users discover your course for relevant keywords.

After filling out the SEO fields, don’t forget to save them.
Add Pricing
Next, we jump to the Pricing menu for adding a price plan to the created course.
Thinkific offers 4 different pricing options. They are –
- Free – Make the course free to the users who sign up with their email addresses. You can also set the expiry date for the free course.
- One-time payment – It lets you set a one-time payment i.e. students have to pay once and access it. If you haven’t set up your payment processor, then you should do it first.
- Subscription/Membership – With it, you can charge students recurring fees for your courses and classes. It’s available on the paid Thinkific plans only.
- Monthly Payment Plan – It helps you split the total payment into multiple small chunks that your students can pay monthly. This option is also only available on paid plans.

We are going to set our course as free for now. Anyway, after adding the pricing for the course, click on the Save button.
Publish the Course
Now, let’s publish the course live. So, click on Publish from the menu at first.
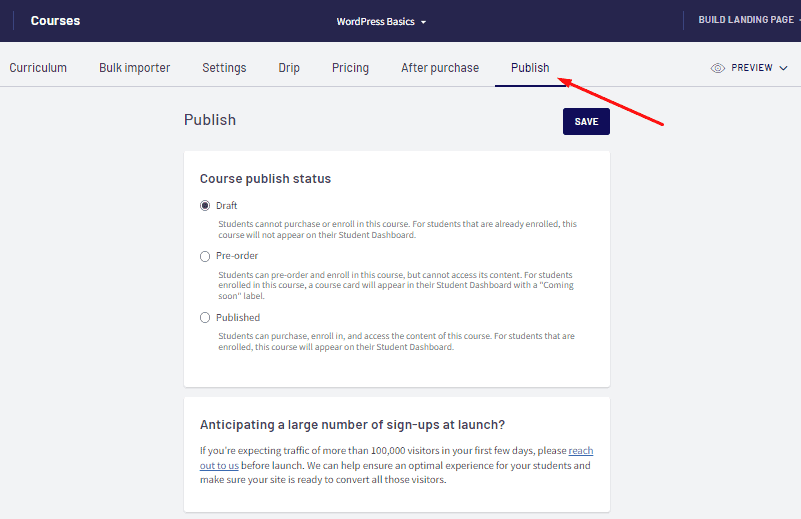
There, you will see 3 options –
- Draft – The course on the draft will not be available for your students. All the courses should be in draft until finalized.
- Pre-order – If you set your course to pre-order, then the students can purchase your course before you publish the course. With this, the students can book their spot for accessing your course in the future. If your course has a high demand, then this pre-order feature is very handy.
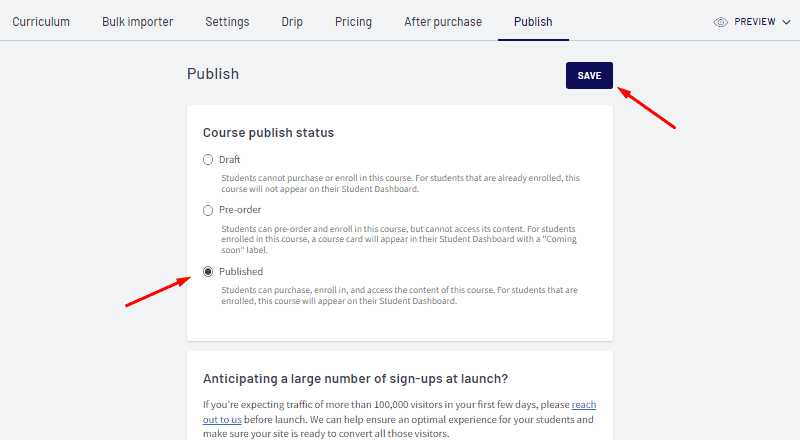
- Published – After setting your course to Published, the course is finally available for the students to purchase and enroll in.
So, to publish the course, you just have to click and select Published and then click on the Save button.
Preview the Course
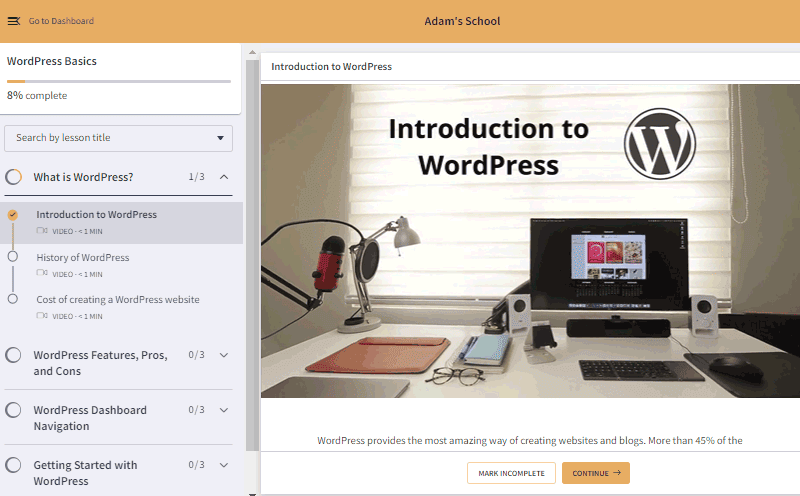
Now that we have created the course, uploaded content, set pricing, and published it, let’s see how it looks to the users.
Just click on the Preview button you see at the top-left of the page and select ‘Course as an Enrolled Student.’
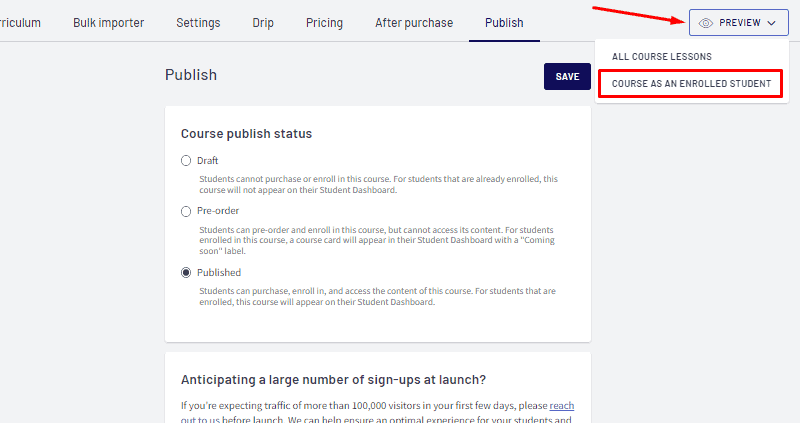
It will take you to the video course player of your course which looks like this.
So, that’s basically all the important things you should follow while creating a course in Thinkific.
However, that’s not all, we have only covered the foundational things! There are lots of other things still to do. Most importantly, you should design a landing page & whole website, integrate and set up email marketing, modify URLs, add a custom domain, set up payments, and create a brandable business.
We suggest you go through the dashboard once and check out all the other available options. If you are stuck, the documentation and the support team are there to help you.
Examples of Online Course Platforms created with Thinkific
Now, let’s see some example course sites created with Thinkific.
Dunbar Academy
Dunbar Academy is a professional dog training academy for dog owners created with Thinkific. It has multiple one-time paid courses, memberships, free courses for training and caring for dogs.

Personal Development School
It’s an online school that offers students 45+ courses with step-by-step instructions to improve peoples’ life with positivity and personal development.

Kid Explorer
Kid Explorer is an online platform made for kids and hosted by kids as well. It offers courses and membership services where these kids teach, explore, and discover new interesting things and share with their members.

Sew It Academy
It’s a platform that helps beginners with little or no experience get started on sewing. It consists of over 30 courses that will cover everything students need to learn sewing and tailoring clothes.

Thinkific Pros and Cons
Like every platform, Thinkific also has its perks and some limitations. So, here are what we discovered.
Thinkific Pros
- Focus on user experience and beginners
- Offers a free plan
- Advanced course builder
- Drag-and-drop builder
- 0% transaction fees on any plan
- Multiple email marketing integrations are available
- Amazing support
- Cohort learning features
- Website branding and white labeling
Thinkific Cons
- Limited course on the free plan
- Basic landing page builder
- Limited community features
- No funnel builder like Kajabi
- The best features are reserved for the premium plans
Thinkific User Reviews

Adreina Adams
March 25, 2023
Great Customer Service
Great Customer Service System is User Friendly A Quality Product that Supports Success
Jamal Abukou
March 24, 2023
Simple, yet powerful platform to create courses
Simple, yet powerful platform to create courses with many guidelines every step of the way.
Mr Nnadozie Nwaoha
March 20, 2023
Best system to use.
It has easy free access and gives one freedom to do other things while the system does all for you. Collections, payments and transfers are done on autopilot.
Kristie Smith_Admin
March 19, 2023
I absolutely love this platform
I absolutely love this platform. It's ever evolving and new integrations make it easy for me to stay ahead of the game 🙂
Yoga Rebel
March 18, 2023
Simple to use
Simple to use. Fantastic tutorials. Nice price.
Mark Karlsson
March 17, 2023
Great platform and easy to use
Great platform and easy to use, well done Thinkific!

Bettina Fröhlich
March 17, 2023
I loved Thinkific at the moment I do…
I loved Thinkific at the moment I do not sell anymore so it is a shame that we could not stop without paying
Sergio SP
March 16, 2023
I love the embedding option for media
I love the embedding option for media. Most of the time, I am able to embed resources from other websites; in this way, my students always stay within the platform, instead of sending them out to multiple websites. Thank you Thinkific, YOU ARE THE BEST!!
Ashley Blanco
March 11, 2023
10/10 Highly Recommend
Thinkific has such a great layout! It is easy to use, visually appealing, and very inviting for the creative soul. I enjoyed using it. Course participants also appreciated the format and their user experience.
Thinkific Pricing

Thinkific operates on a freemium model. Meaning, it offers a basic free plan and well as different levels of paid options.
The free plan of Thinkific is best for letting users sell a course with unlimited content and video hosting without charging anything for it.
Moreover, there are 5 different paid plans that add lots of amazing creating and selling tools to your online school. And, the services go on adding up as you move to the higher plan. While the basic paid plan starts at $39 per month paid annually.
Anyway, here are the pricing plans offered by Thinkific.
- Free – $0 | 1 course | 1 admin | 0 communities
- Basic – $39 | unlimited courses | 1 admin | 0 communities
- Pro – $79 | unlimited courses | 2 admin | 1 community
- Pro + Growth – $119 | unlimited courses | 2 admins | unlimited communities
- Premier – $399 | unlimited courses | 5 admins | unlimited communities
- Plus – customized pricing | unlimited courses | unlimited admins | unlimited communities
| Plan | Price (Monthly) | Courses | Admin Users | Communities |
|---|---|---|---|---|
| Free | $0 | 1 | 1 | 0 |
| Basic | $39 | Unlimited | 1 | 0 |
| Pro | $79 | Unlimited | 2 | 1 |
| Pro + Growth | $119 | Unlimited | 2 | Unlimited |
| Premier | $399 | Unlimited | 5 | Unlimited |
| Plus | Custom | Unlimited | Unlimited | Unlimited |
Thinkific Alternatives
Thinkific is a great option for creators looking for ease and better experience in creating courses. But, like any other service, Thinkific has also got its benefits and limitation.
There are other options out there that might differ from Thinkific in terms of factors like cost, customer support, marketing features, pricing options, etc.
So, here are some of the competitors of Thinkific.
Teachable
Teachable is another fully customizable online course learning platform made for beginners. It is useful to create online courses, memberships, and coaching programs.
Along with that, it offers lots of marketing and selling features like enabling free trials, SEO, integrations, affiliation, content dripping, tracking, etc.
Like Thinkific, Teachable also offers a free plan. However, Teachable charges transaction fees for each sale you conduct ($1 + 10%).
Kajabi

Kajabi is a robust tool for creating a total online portal for creating not only online courses but also offering coaching, membership, podcasts, communities, etc.
Actually, Kajabi is more than just a course platform – it provides an all-in-one solution for creating a digital product platform with websites, landing pages, marketing, pipelines, analytics, email, automation, upsells, etc.
It doesn’t offer a free plan, but a free trial of 14 days. The price for its plans is quite high compared to Teachable but has lots of advanced features nonetheless.
Podia
Podia is another popular tool for complete online school solutions – it lets you create unlimited courses, webinars, digital downloads, and community.
Along with creating courses, it is also great for marketing and selling with the available features like email marketing, Zapier integration, affiliation, chat support, branding, etc.
LearnWorlds

LearnWorlds is an online course builder with numerous tools for creating courses, building landing pages, marketing, selling, and analytics.
It offers different ways for enhancing engagement and interaction with your student with interactive video players, online testing engines, pop-ups, etc.
It doesn’t offer a free plan. However, it starts cheap i.e. $29 per month.
Conclusion
From this Thinkific review post, we concluded that Thinkific is the best option for someone who is just creating their first online course on an affordable budget. It is backed by its user-friendliness, ease of use, and hands-on features.
Moreover, it also provides your own website with a custom domain. So, there is no need to host a separate website for your course. Along with that, the integrations for email marketing, automation, and tracking tools let you flourish your marketing and sales. In short, you get everything in one platform without busting your bank.
Not to mention its free plan, which can publish a course for you with tons of content and without charging you a single dime.
Thinkific FAQ

Other Recommended Apps


