The tools and plugins recommend in the site are the ones we use, have tried or tested ourselves and recommend to our readers. Marketing With WP is supported by readers like yourself. If you take an action (such as a purchase) we might earn an affiliate revenue at no extra cost to you.
How to Create or Add New Post in WordPress Website?

Let’s see how to create a new post and edit various aspects of the post inside a WordPress website.
A post (blog post) contains relevant information for users to gather information and take an action. Typically, it contains text, images, videos, graphics, and other elements.
Let us explore how to create and add a new post in WordPress.
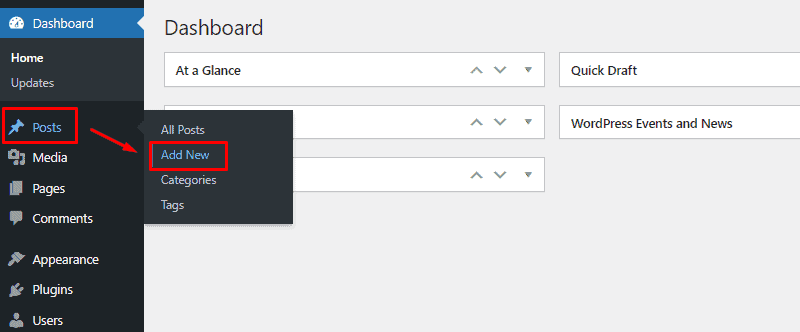
Go to Posts > Add New
First, you should start with Posts > Add New from the WordPress dashboard.
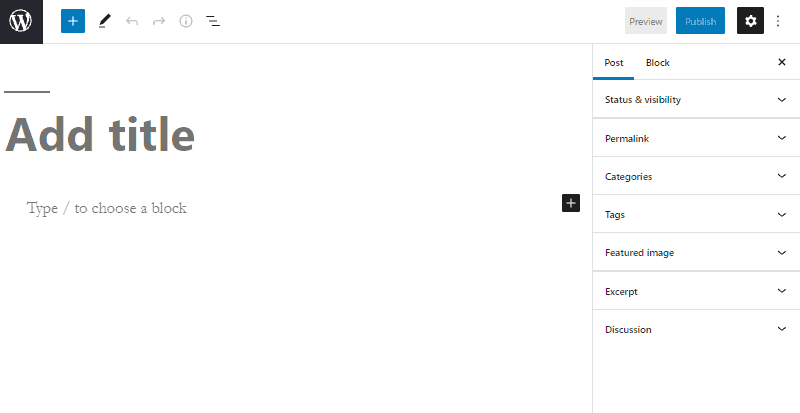
Then, it will take you to the Gutenberg editor, the same default editor we used to create a new WordPress Page.
The core content creation area is the robust editable blocks in the Gutenberg editor – which makes it easy to create new posts.
The central part of the interface is the space where you write the post content. And on the right side, there are post settings for managing the post publishing options and block settings for editing the selected Gutenberg block. Also, you’ll see other options like publishing, and previewing.
Add Post Title
The first thing you should do is add a title for the post. It’s the name of your post, so make sure that it is relevant and describes the content on the page properly.
Another thing, the post title is an important factor for search relevancy. So, you should also create titles based on what users are searching for in search engines.
Also, the post permalink URL will automatically be set from the title if you have settings configured like that. The permalink can be changed anytime.
Anyway, you should name the post title that best describes its content.

Add Blocks for Content
Next, you can start adding the actual post content with the help of the Gutenberg blocks.
We have already seen how to use the Gutenberg blocks for adding content. Just click on the plus (+) button or type slash (/) to choose and add from the list of the available Gutenberg blocks.

You might not need all the blocks available in the library for blog posts right away. Some of the most useful ones are listed below.
- Paragraph – You can use this block to write text content.
- Heading – You need to give a proper structure of the blog articles with headings. With the WordPress heading block, you can add heading up to 5 levels. Make sure that you add the headings and sub-headings in proper order.
- List – This block allows you to list point items in ordered and unordered lists.
- Quote – It is useful if you want to highlight valuable text content on the post.
- Image – If you want to add pictures to your blog post, then use this block. It lets you upload images from your local drive or select from the library.
- Spacer – It allows you to add space between block content.
- Separator – It is used to set a small divider between 2 content blocks to set them apart.
- Table – The table block is useful if you want to add simple tables in the posts.
- Buttons – It’s useful to add call-to-action buttons in WordPress posts.
- Columns – With the Column block, you can divide the block into multiple columns and add separate content to each of them.
Configure Post Settings
To manage the Post settings, click on Post at the right sidebar of the editor interface.
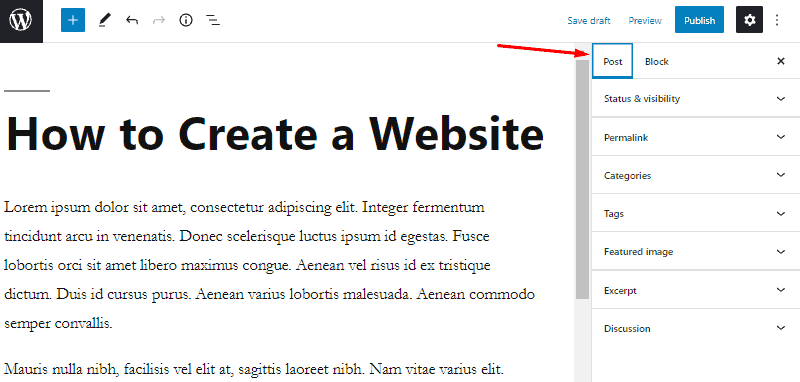
From here, you can manage the following settings.
Set post visibility
It is for setting up the privacy of the post i.e. managing who can see your post. It has 3 options
- Public – This option makes your post visible to everyone and enables Google to index it.
- Private – Making a post private will hide it from your audience. Only website admins and editors can see private posts on the backend.
- Password-Protected – With this option, you can lock the posts with a password. Users can only access it using the password you set.
By default, the post visibility is public. If you want to change it, then click on it and select another option.

Schedule Publish Date and Time
WordPress offers another robust blogging feature – post scheduling. With that, you can choose a date to publish your post if you want to delay the publish.
By default, it’s set to be published instantly. However, you might want to program the publish at a specific time.
To configure the date for the publishing schedule, click on ‘Immediately’, and then choose the date and time of the publish.

Moreover, there’s also the unique option for blog posts – ‘Stick to the top of the blog’. If you check this option, the blog post will stick to the top of your blog page.

Create a custom permalink
We have seen how to set a permalink for posts on the Permalink settings.
Moreover, you can set a custom permalink for each post directly from the WordPress post editor.
To create a custom permalink, click on Permalink on the sidebar. Then, enter the custom URL you want.

You can see the updated full permalink of the post right underneath.
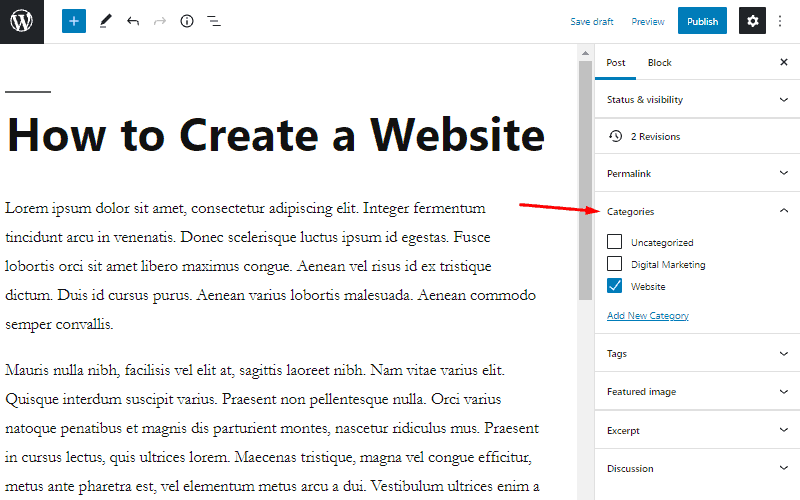
Select Categories
Now, on the right sidebar, there is the option to select the category for the post.
Click on Categories and then pick the respective category by clicking on the checkbox with the category name. You can select multiple categories for the posts as well.
If you don’t have any relevant category for it, then select the default category which is usually – ‘Uncategorized’.
Select Tags
Similarly, you can select multiple tags for the post.
But instead of a checkbox option, the tags need to be typed in.

Set a featured image
Adding a featured image to a post is similar to that of a page. However, the featured image is mostly relevant for posts, to visually display the post in post pages, blog archives, and social media shares.
To add a featured image to a post, click on Featured Image on the right sidebar in the post editor. After that, click on Set Featured Image to select the appropriate image. You can either upload it directly from your device or choose from the media library.

Configure Discussion
If you want to allow your audience to comment on your posts to increase audience engagement and interaction, you have the option to turn the comment feature on.
Also, there’s the option to allow pingbacks and trackbacks. Pingbacks and trackbacks are the ways by which blogs send and receive notifications for linking other blog posts.
For configuring the discussion setting, just click on Discussion on the right sidebar first.
Now, check the boxes if you want to enable users to comment or allow pingbacks and trackbacks.

Save Draft, Publish, and Preview
After completing the post, you can either publish it directly, schedule it as discussed above or save it as a draft. Also, you can first check the post for different devices.
Save draft
Saving a post as a draft allows you to save the post without publishing for future edits and corrections.
You can simply click the Save Draft button on the top for saving it as a draft.

The draft can also be saved with shortcut keys – Ctrl + s.
Preview
Next, you can see how the post looks on a phone, tablet, and desktop by clicking on Preview.
You can also open the preview page on a new tab for the desktop view.

Publish
And, clicking the Publish button will publish the post right away if you haven’t set a schedule.

Before the post is published to go online, WordPress asks and confirms post visibility and publishing schedule. This can be edited. Click on Publish once everything is good and finalized.

